A Beginner's Guide to Connecting Zilliz Cloud with Azure Marketplace
A Beginner's Guide to Connecting Zilliz Cloud with Azure Marketplace
Introduction
Zilliz Cloud, powered by the robust open-source vector database Milvus, is known for its scalability and precision in handling vector embeddings. It integrates seamlessly with leading AI vectorizers like those from OpenAI, Cohere, and HuggingFace, making it an excellent tool for developers to add and manage large volumes of data vectors effectively.
The availability of Zilliz Cloud on Azure Marketplace is a significant development for its users. This integration offers a direct path to incorporate Zilliz Cloud's advanced vector database capabilities within Microsoft Azure's extensive cloud ecosystem.
Azure users benefit from enhanced data security, greater scalability, and improved ease of operations, which are important for efficiently managing extensive AI projects and large-scale data operations.
Getting Started on Azure Marketplace
Subscribing to Zilliz Cloud through Azure Marketplace is designed to be a straightforward and beneficial process for users. This direct integration into Azure simplifies the initial setup and subscription, allowing users to leverage Azure's robust infrastructure while utilizing Zilliz Cloud's advanced vector database functionalities.
The benefits of this setup include seamless integration with existing Azure services, centralized billing, and the ability to scale resources according to project needs without compromising on performance or security. This simplicity ensures developers and IT professionals can focus more on their core projects and less on administrative overheads.
Here is the step-by-step process to connect Zilliz Cloud with Azure Marketplace:
Step 1: Search and Subscribe
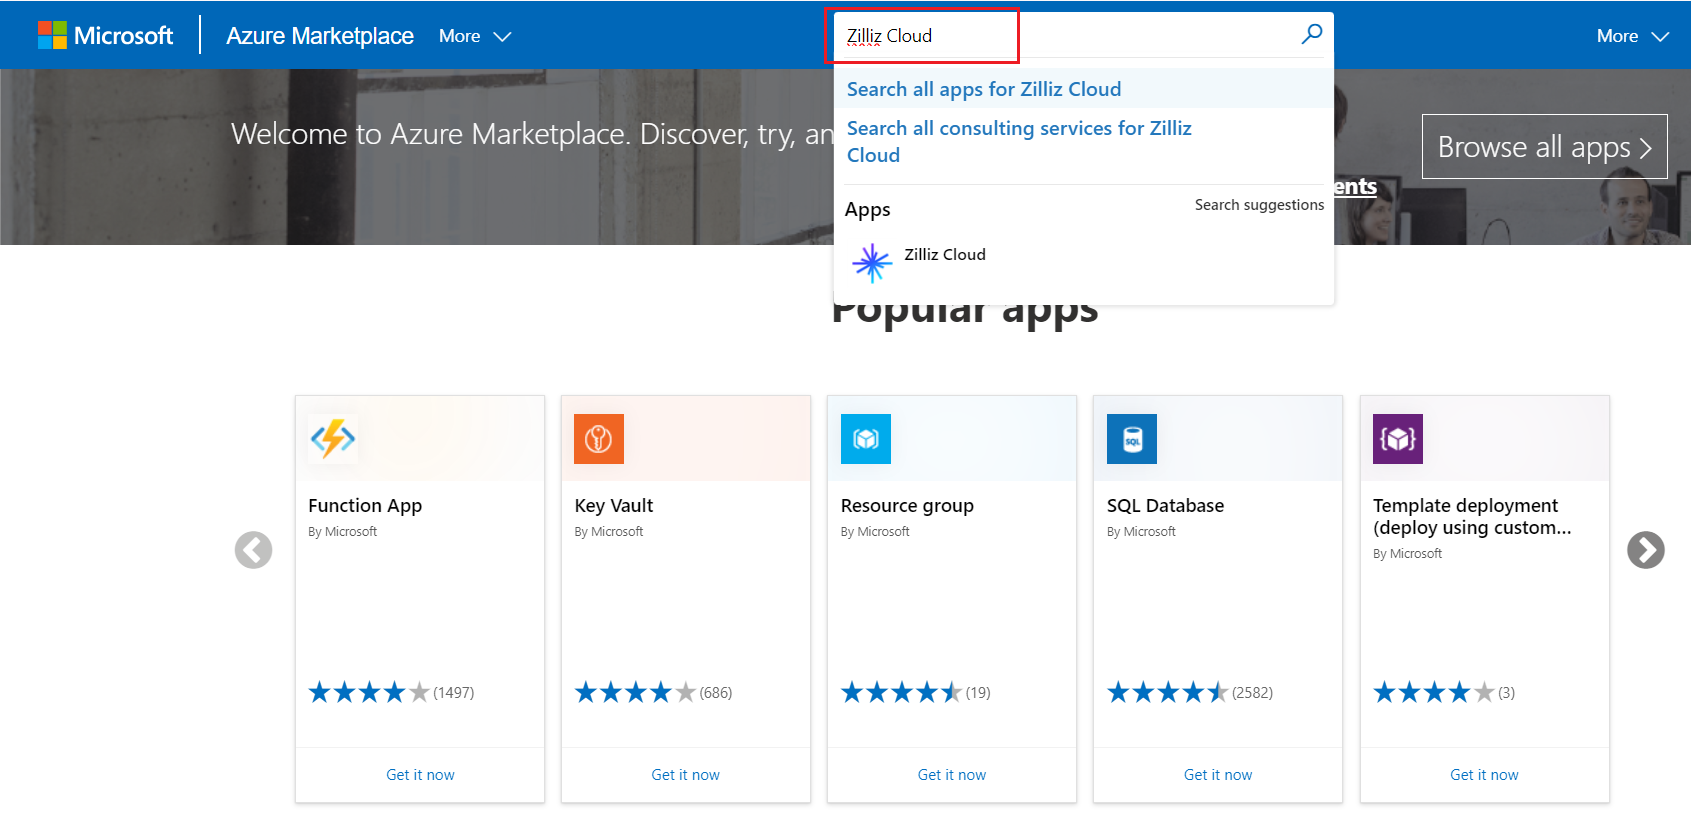
To begin using Zilliz Cloud via Azure Marketplace, you must first locate the service. To do so, navigate to the Azure Marketplace homepage and enter "Zilliz Cloud" in the search bar. This will direct you to the Zilliz Cloud service page.
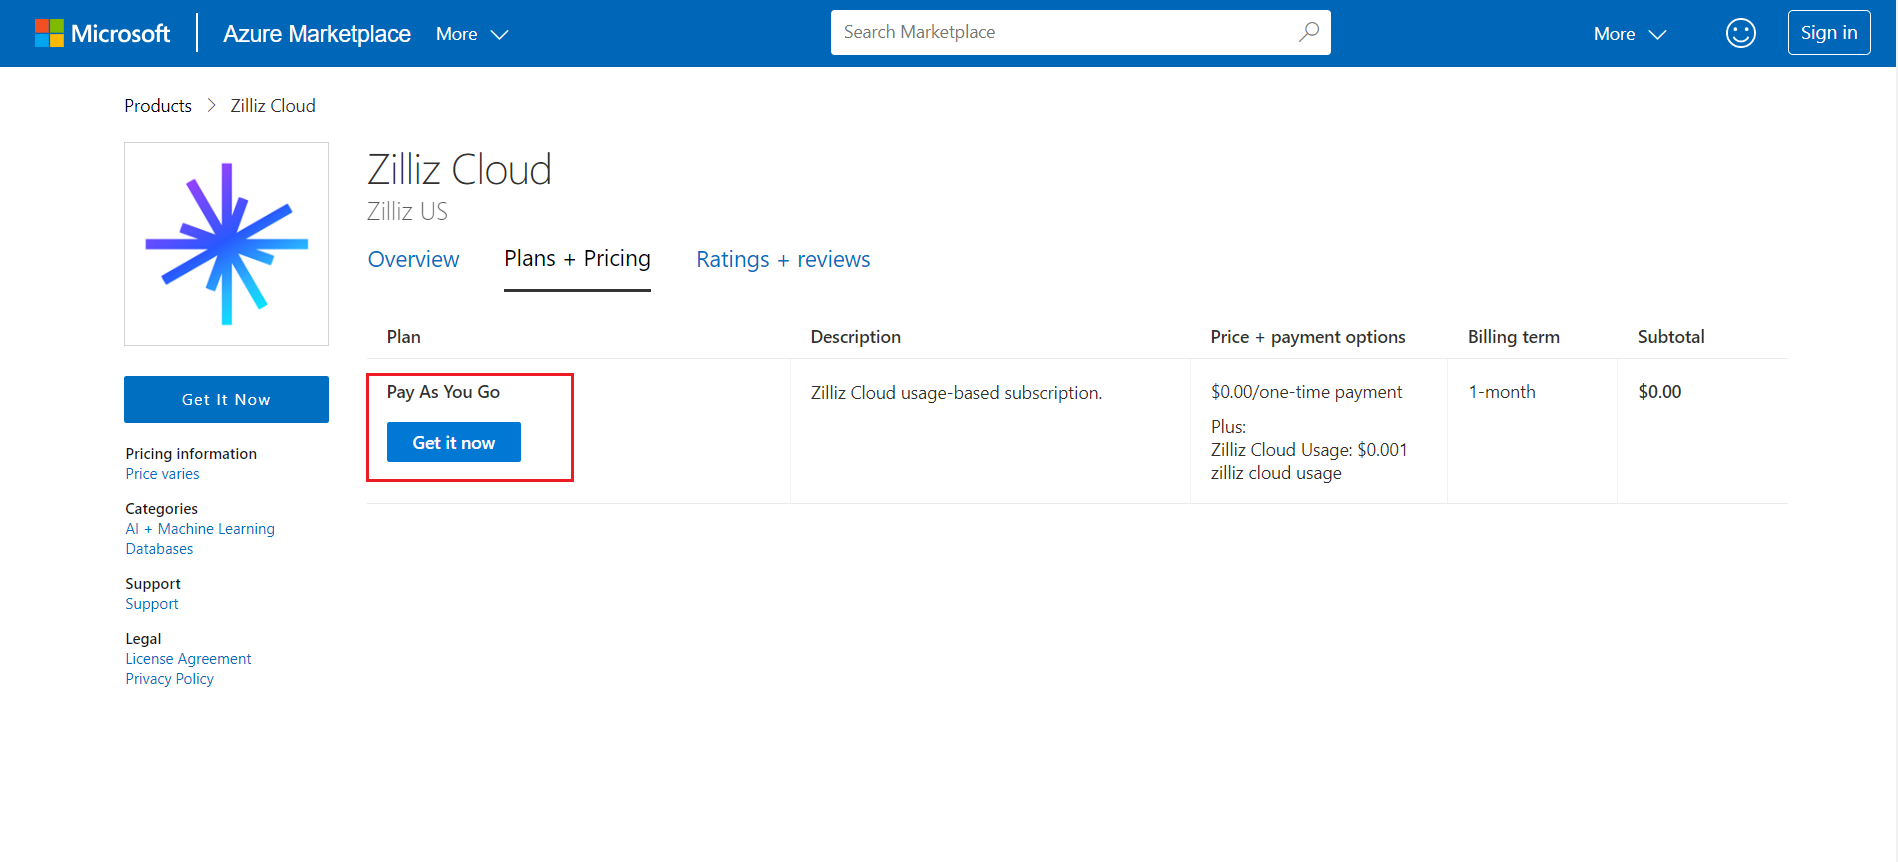
Once on the service page, review the various plans and pricing options available. Zilliz Cloud offers a range of subscriptions tailored to different usage scales and needs, ensuring you can find one that matches your project requirements and budget.
After selecting the appropriate service plan, click on the "Get it now" button. You will be prompted to log in with your Microsoft Azure account credentials if you have not already done so.
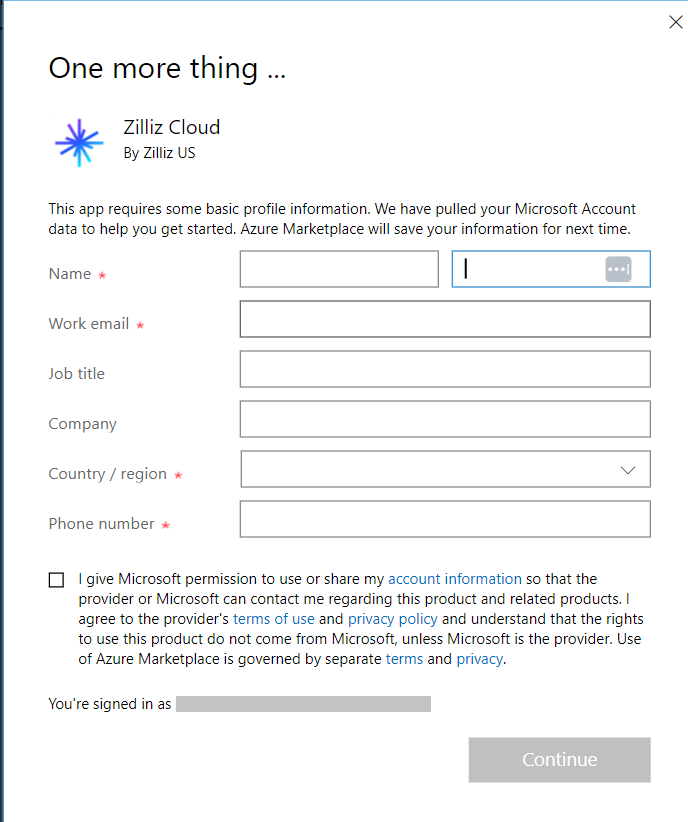
Follow the on-screen instructions to provide the necessary information and confirm your subscription details. This completes the initial subscription process, setting you up to integrate Zilliz Cloud seamlessly into your Azure environment.
Step 2: Subscription Configuration
Once you have subscribed to Zilliz Cloud on Azure Marketplace, the next step is configuring your subscription to suit your specific project needs and details on software as a service (SaaS).
Configure Project Details
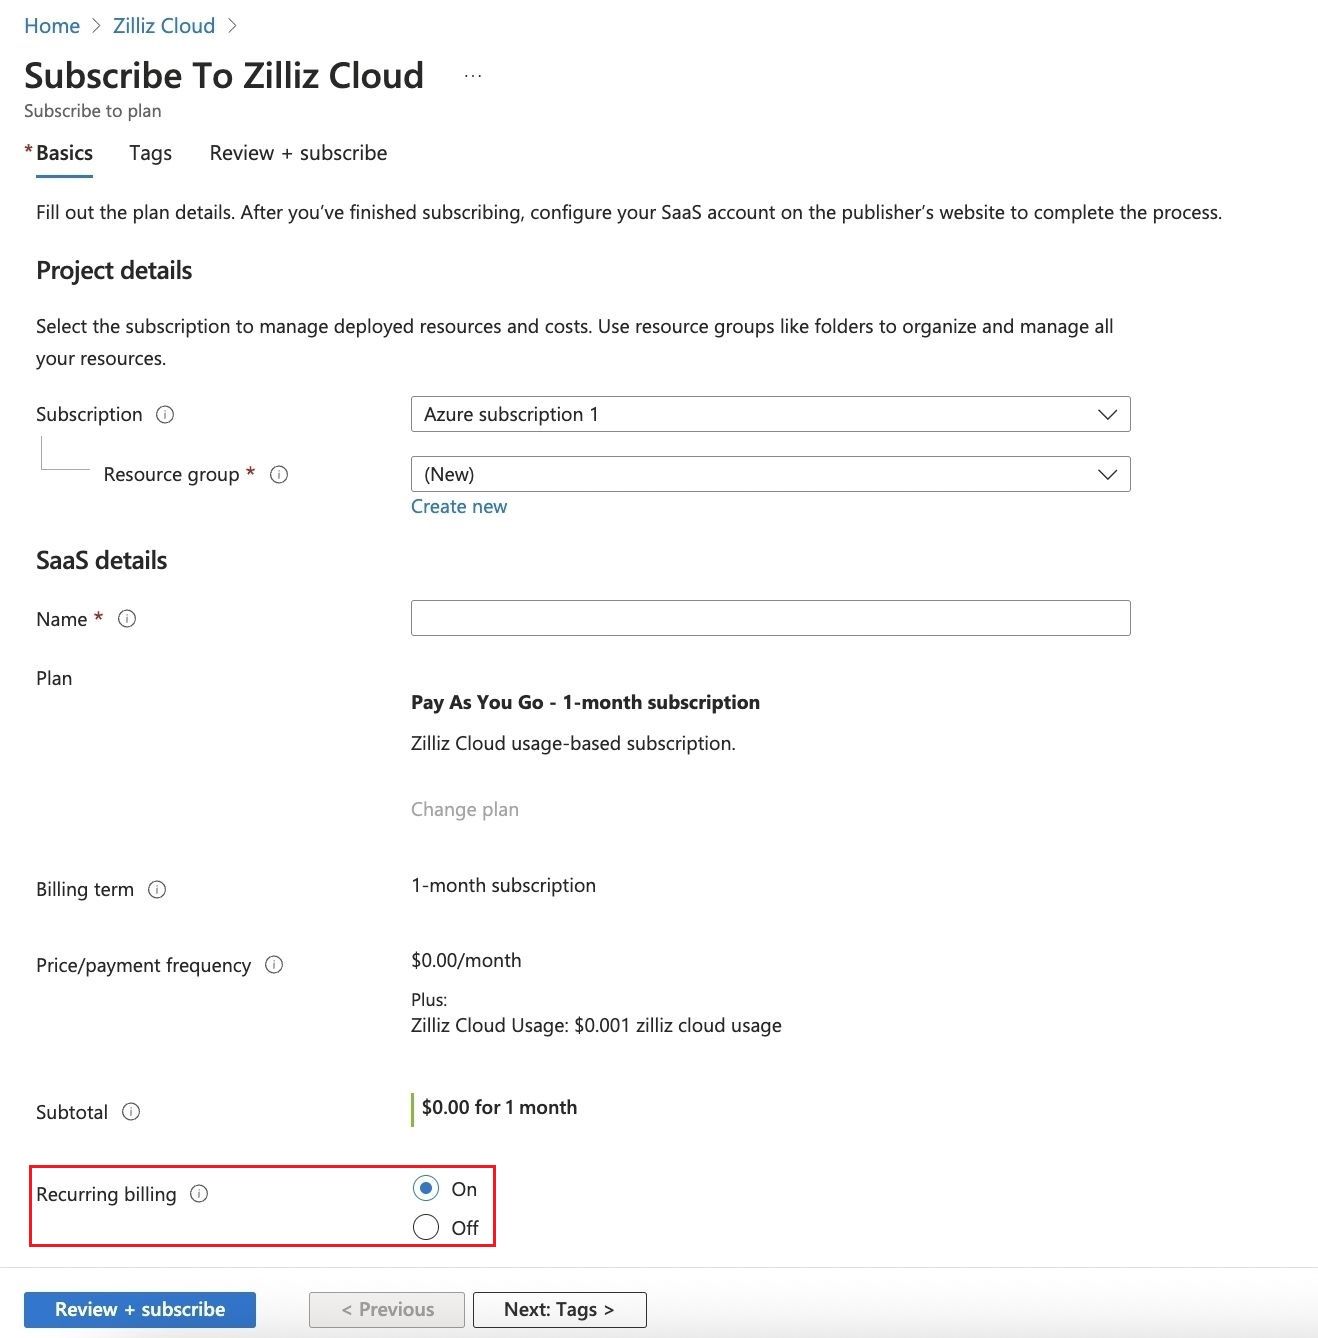
Access the configuration page within the Azure Marketplace dashboard for Zilliz Cloud. Here, you can specify your project's parameters, such as the project name, associated resources, and any specific settings relevant to how Zilliz Cloud will be used within your environment.
Set Up Recurring Billing
Recurring Billing is an important feature that ensures your service continues without interruption. On the same configuration page, you will find options to enable Recurring Billing. Turning this on means your subscription fees will automatically be billed to your chosen payment method each month, avoiding service disruptions.
This is important for businesses that rely on continuous data access and operations, as it ensures no service breaks due to billing issues.
 Step 2.jpeg
Step 3: Account Configuration
After configuring your subscription settings, the next step is to link your Azure Marketplace subscription with your Zilliz Cloud account. This ensures that your Zilliz Cloud services are correctly associated with your Azure account, enabling streamlined management and integration.
Linking the Subscription
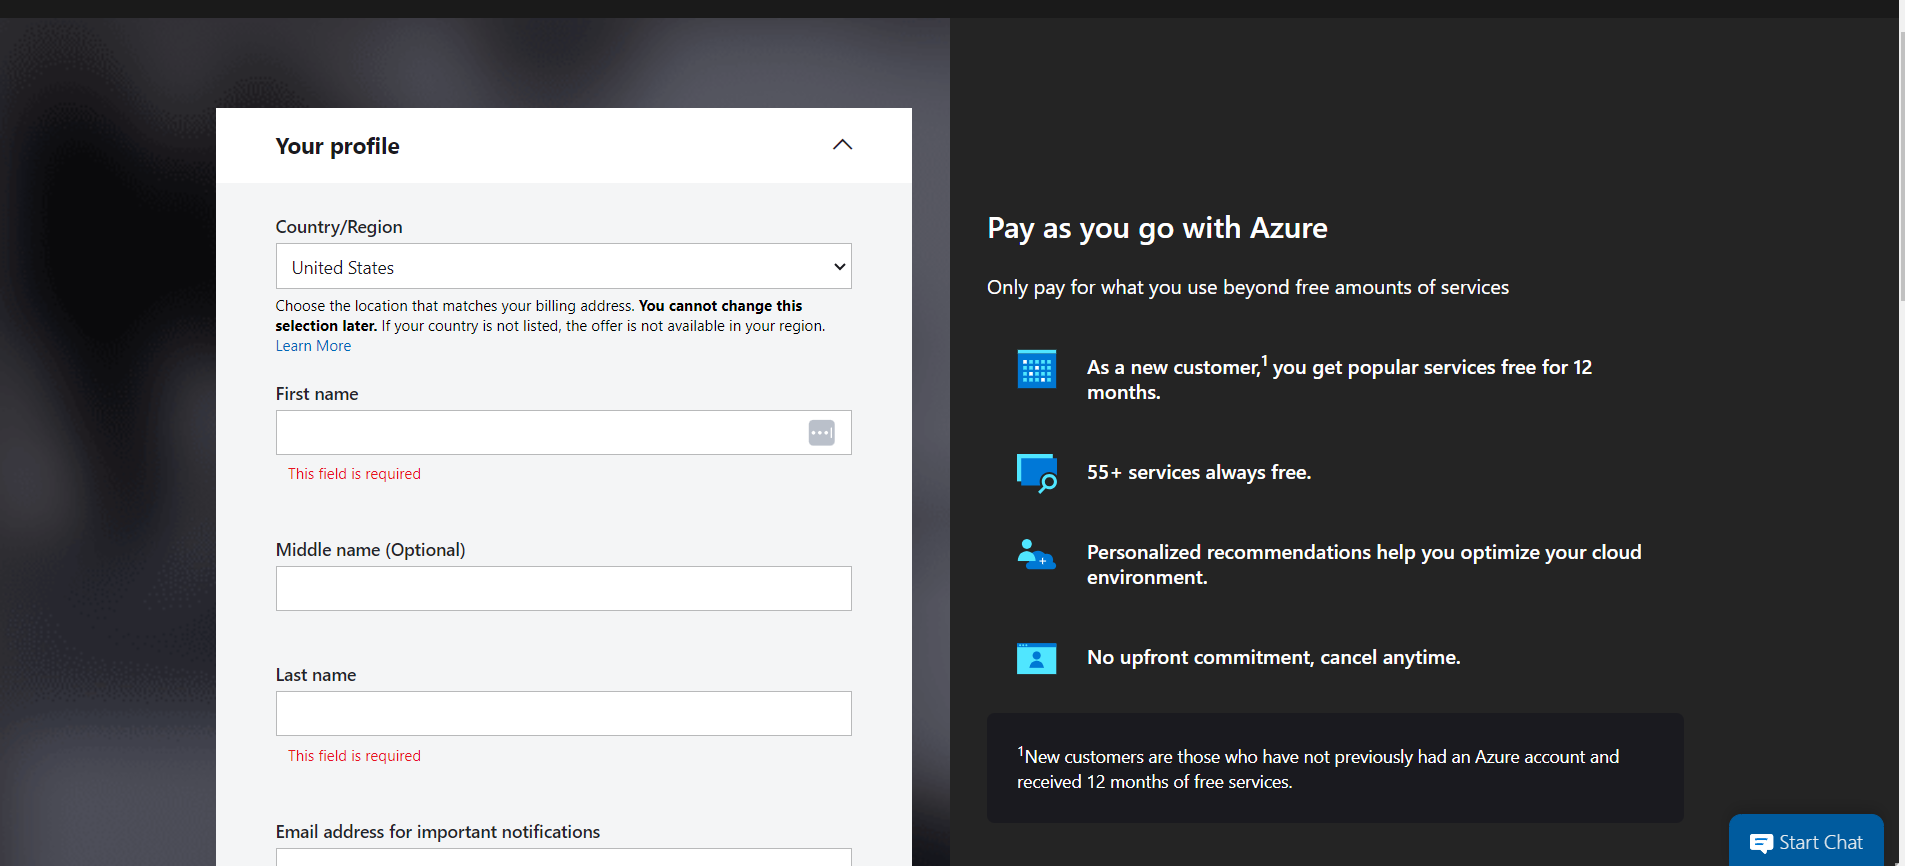
Navigate to the Zilliz Cloud dashboard within Azure Marketplace. Click on the "Configure account now" button. This will direct you to a page where you can either log into your existing Zilliz Cloud account or sign up for a new one if you don't have one yet.

Log In or Sign Up for Zilliz Cloud
If you are a new user, complete the sign-up process by entering the required details and creating your account. Log in using your credentials if you already have a Zilliz Cloud account.
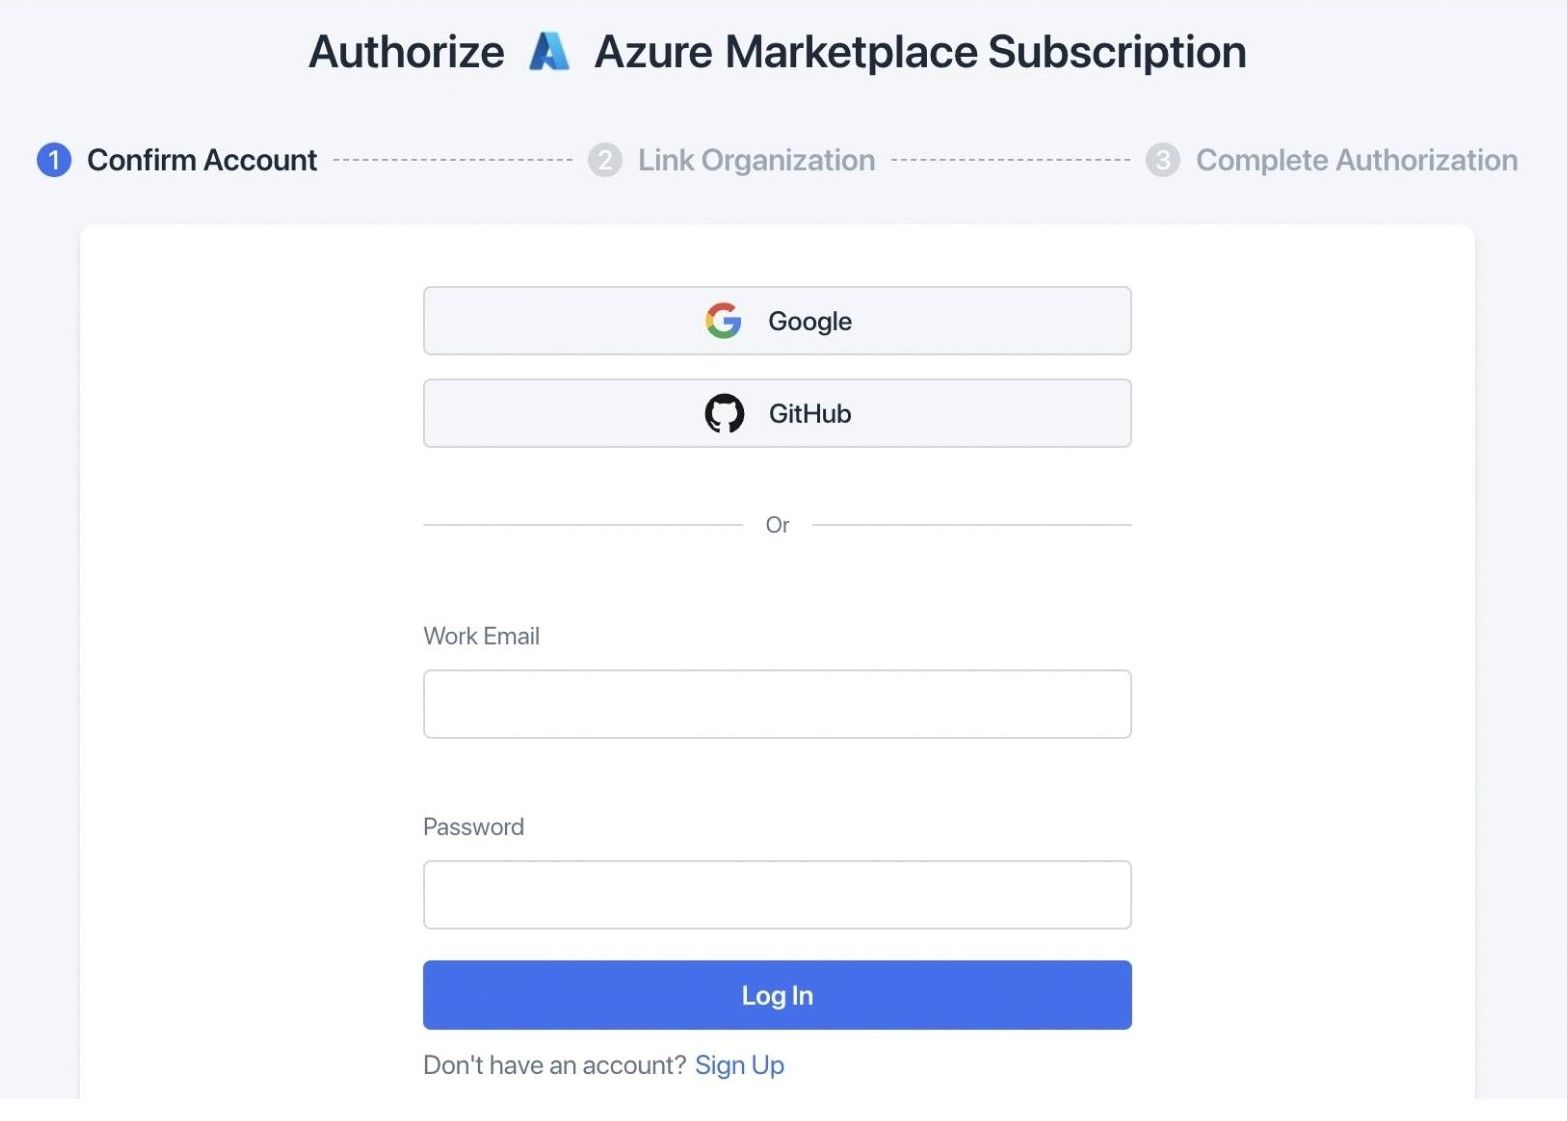
Authorize and Complete the Linkage
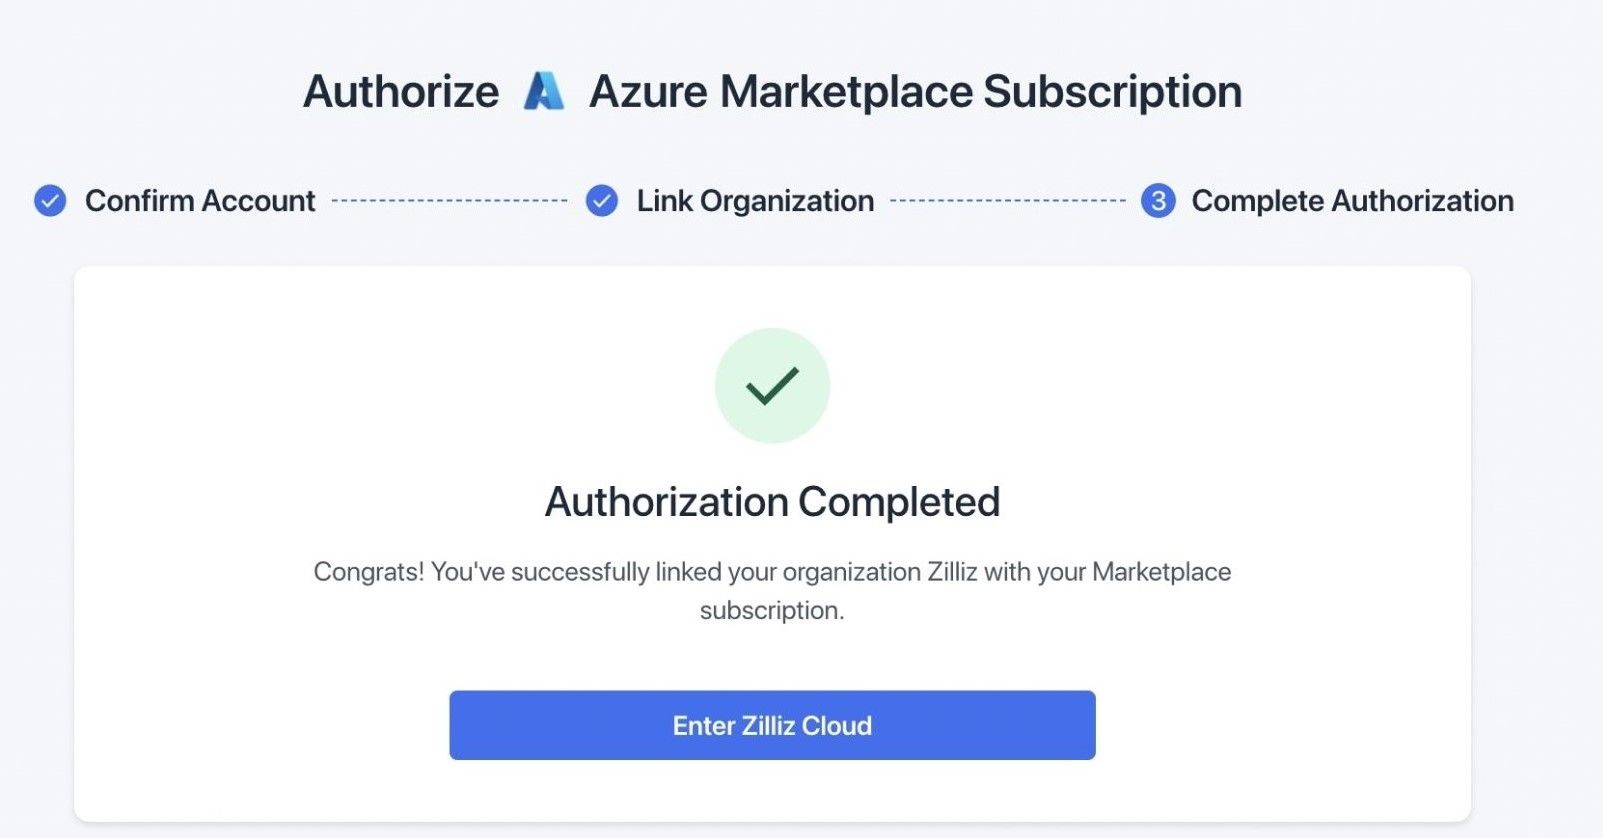
Once logged in, follow the prompts to link your Azure Marketplace subscription to your Zilliz Cloud account. You may need to authorize the linkage to confirm that the correct Azure subscription is connected to your Zilliz Cloud account.
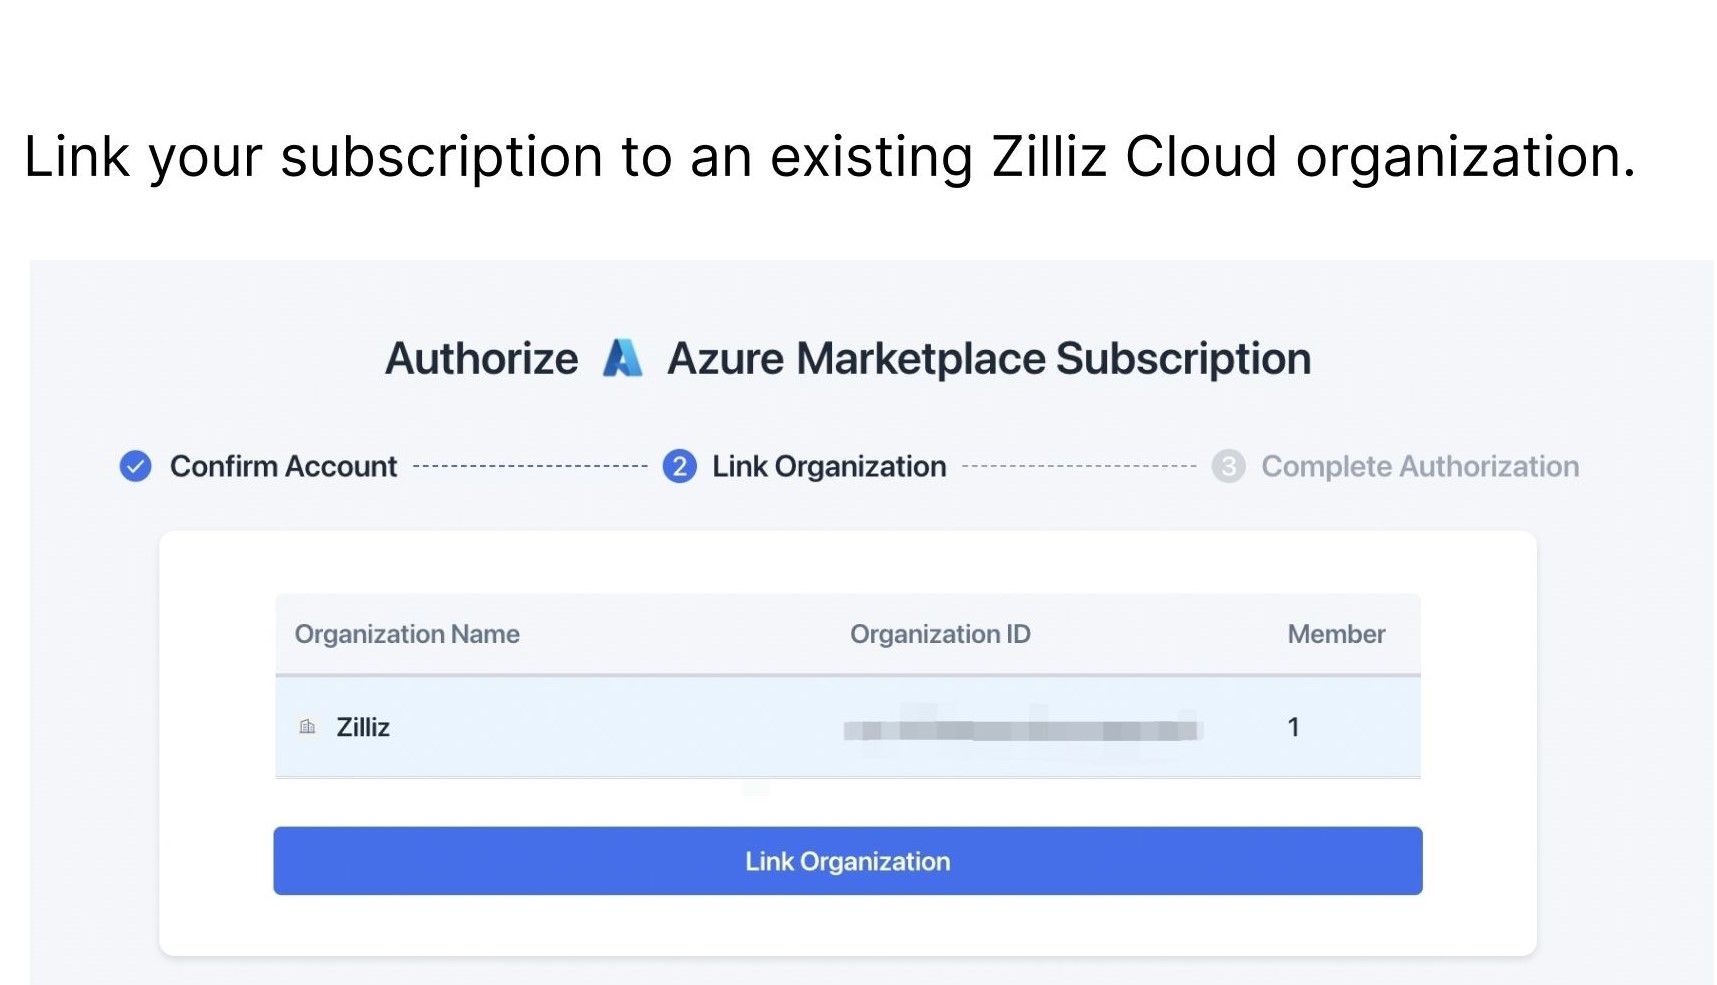
By completing these steps, your Zilliz Cloud account will be fully integrated with your Azure Marketplace subscription, facilitating seamless access and management of Zilliz Cloud's services directly from your Azure portal.
Step 4: Billing and Payment Integration
The final step in integrating Zilliz Cloud with Azure Marketplace involves setting up and confirming your billing arrangements. This step ensures that all payments for the services are processed smoothly through your Azure account.
Access the Billing Section
Navigate to the billing section on the Zilliz Cloud dashboard within Azure Marketplace. This section is typically found under account settings or similar navigation areas.
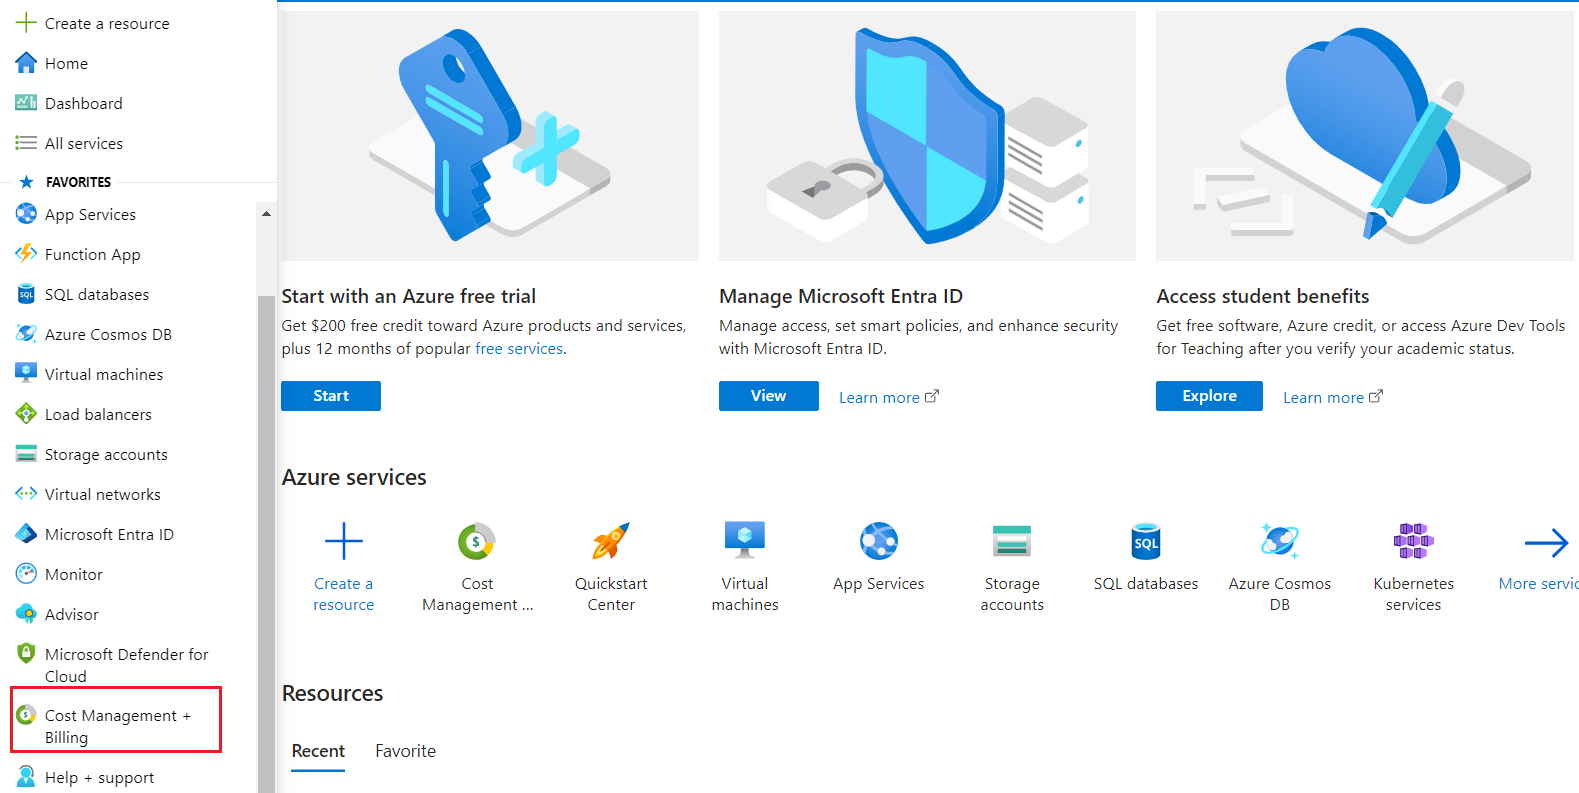
Set Azure Marketplace as Payment Method
In the billing section, you will find options to manage and verify your payment methods. Select Azure Marketplace as your default payment method for Zilliz Cloud services. This selection ensures that all service charges are billed directly through your Azure account, leveraging Azure's security and management features.

Verify and Confirm Settings
After setting Azure Marketplace as your payment method, review the details to ensure everything is correct. Confirm the settings to complete the integration process. You may receive a confirmation via email or a notification within the dashboard confirming that your billing setup is complete.
By following these instructions, you will successfully integrate billing and payment processes between Zilliz Cloud and Azure Marketplace, ensuring a seamless financial transaction experience and enabling you to focus more on utilizing the powerful capabilities of Zilliz Cloud.
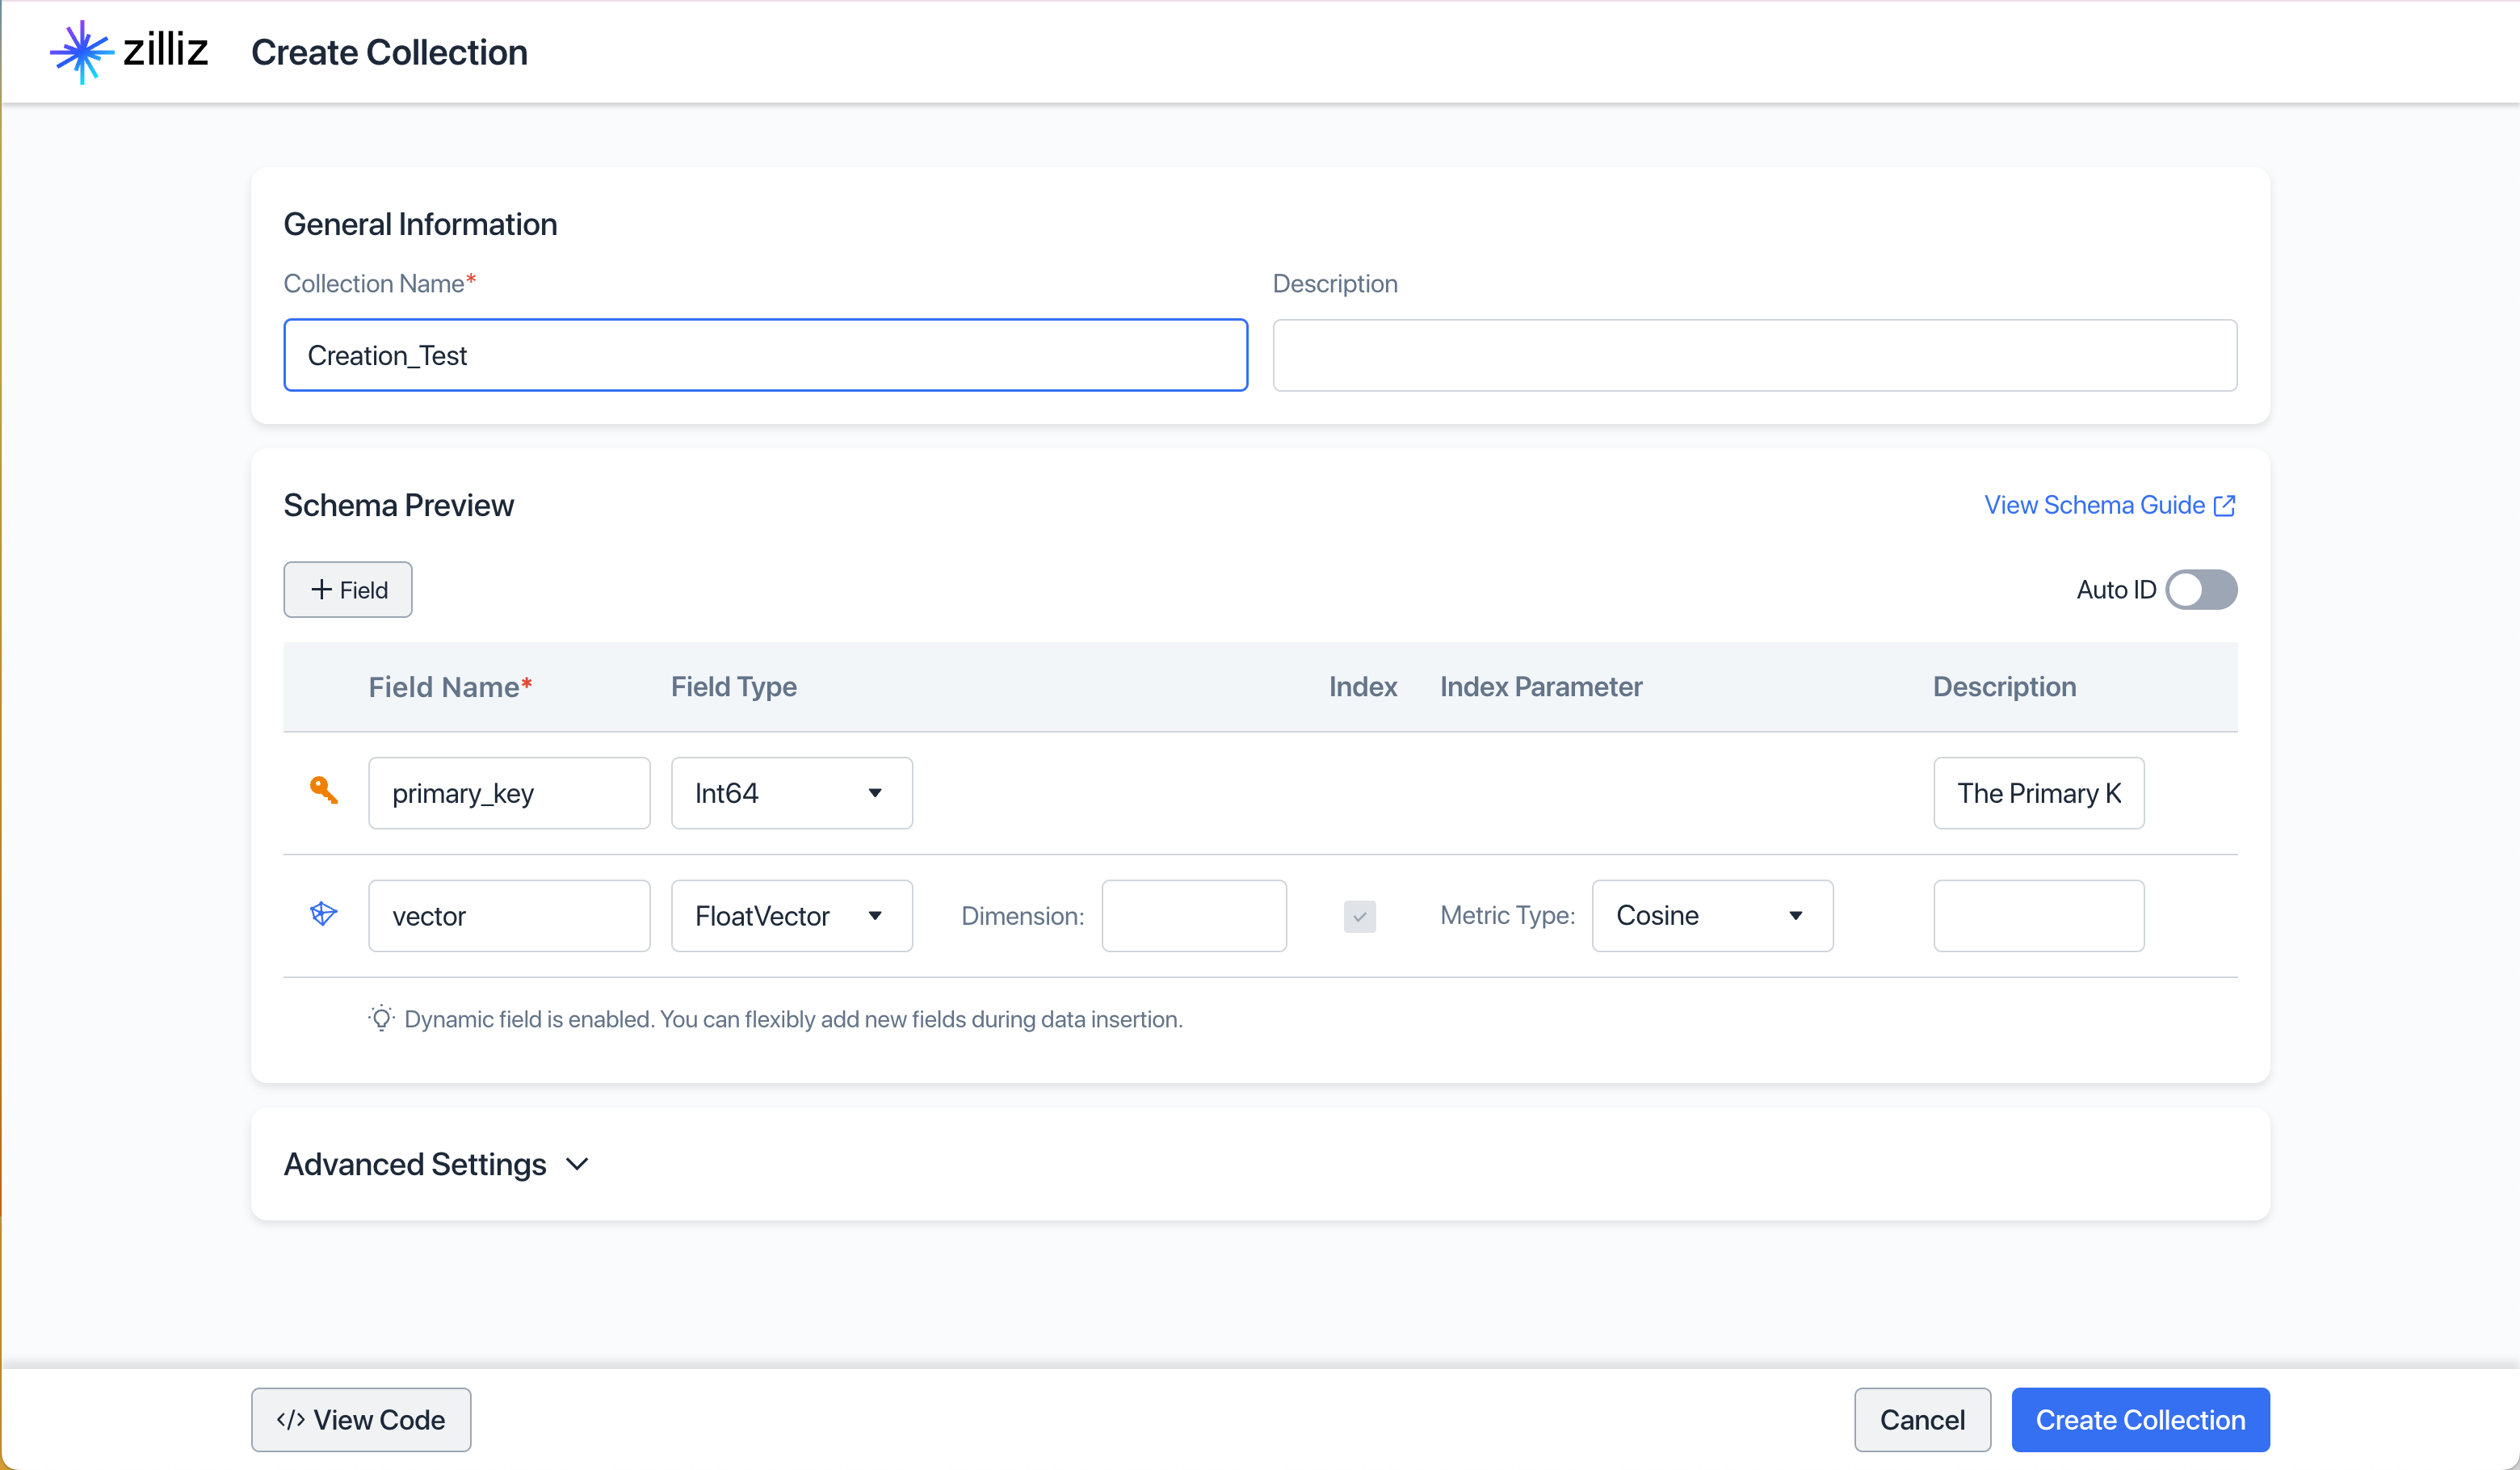
Now that you have a cluster created, let’s go ahead and create a collection by clicking on the “+ Collection” button. Once you do that, this screen will appear:
 Create a Collection.png
Leave the primary_key as is, and change the dimensions for the vector entity to 768. The vector field is also set using the “Cosine” metric type and in the “Advanced Settings” you can choose whether the field is fixed or dynamic; and for this collection we will just leave those default settings. Name your collection and click on the “Create Collection” button.
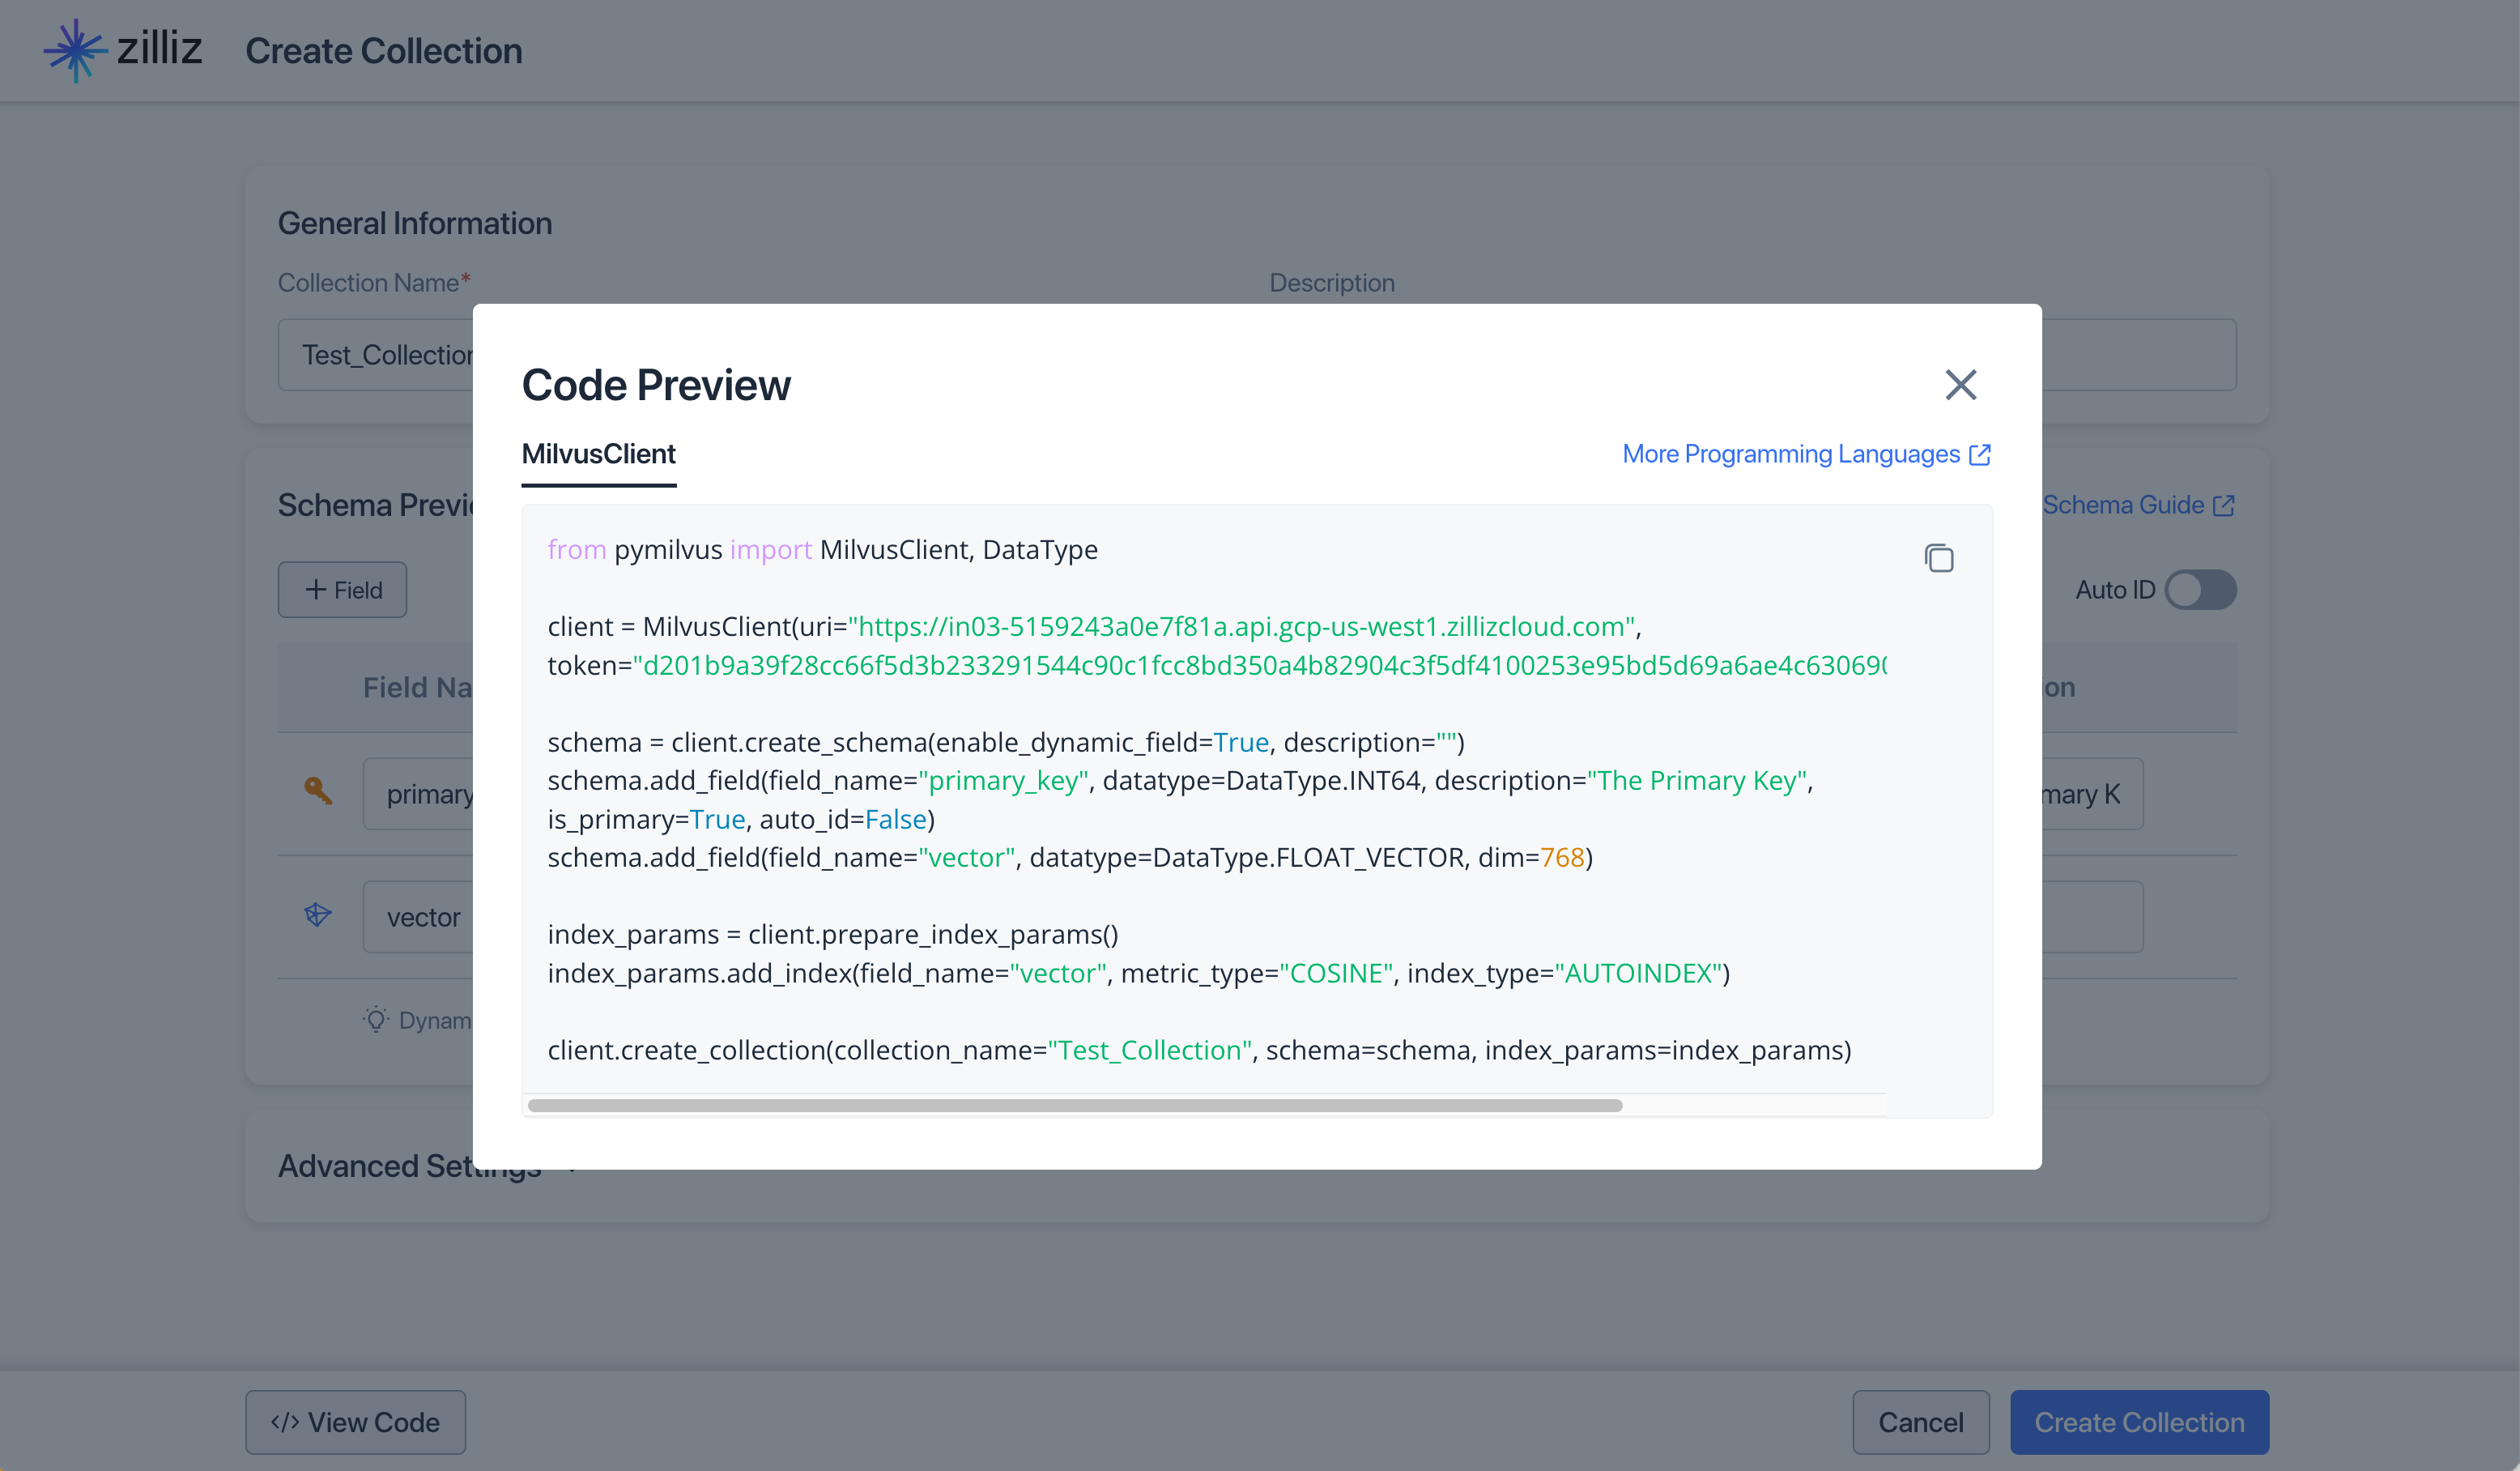
You can also grab the code snipped if you want to create the collection with PyMilvus by clicking on “View Code.”
 Pymilvus.png
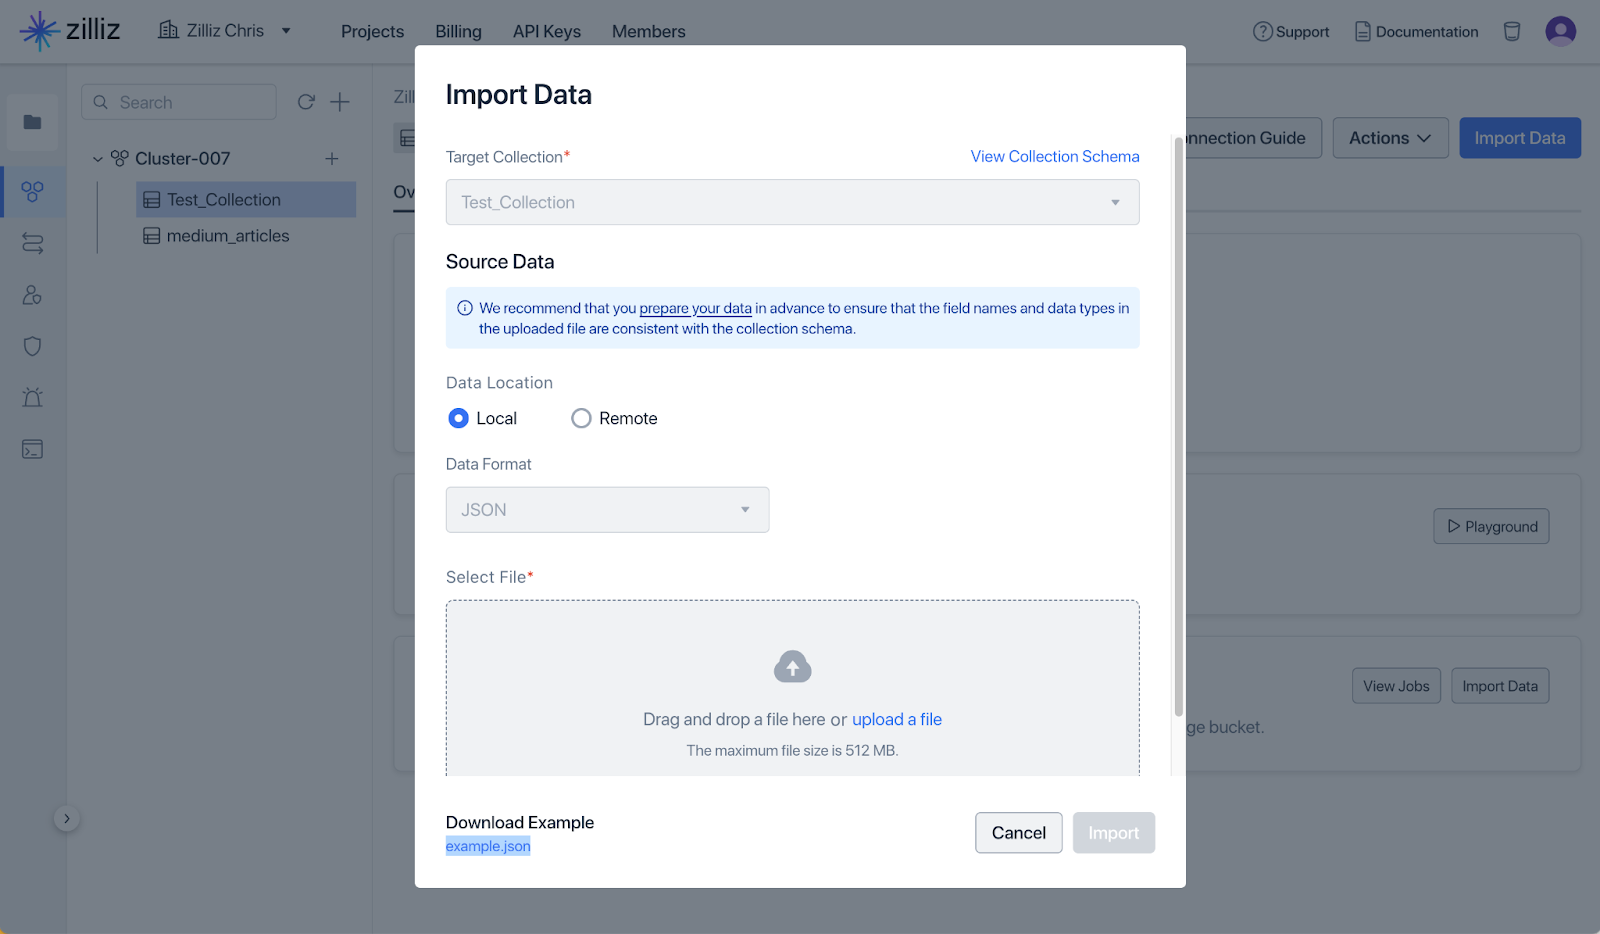
Once the collection is created, click on the “Import Data” button and download the Example data titled “example.json.” This example data just has a primary key and embeddings and no meta data to filter on. Once downloaded, upload the data into your collection by following the instructions in the UI.
Once you have data in your collection, go to the “Data Preview” tab to take a look at the data. You can play around with the search capabilities just to get a sense of what is available in the UI in the “Vector Search” tab.
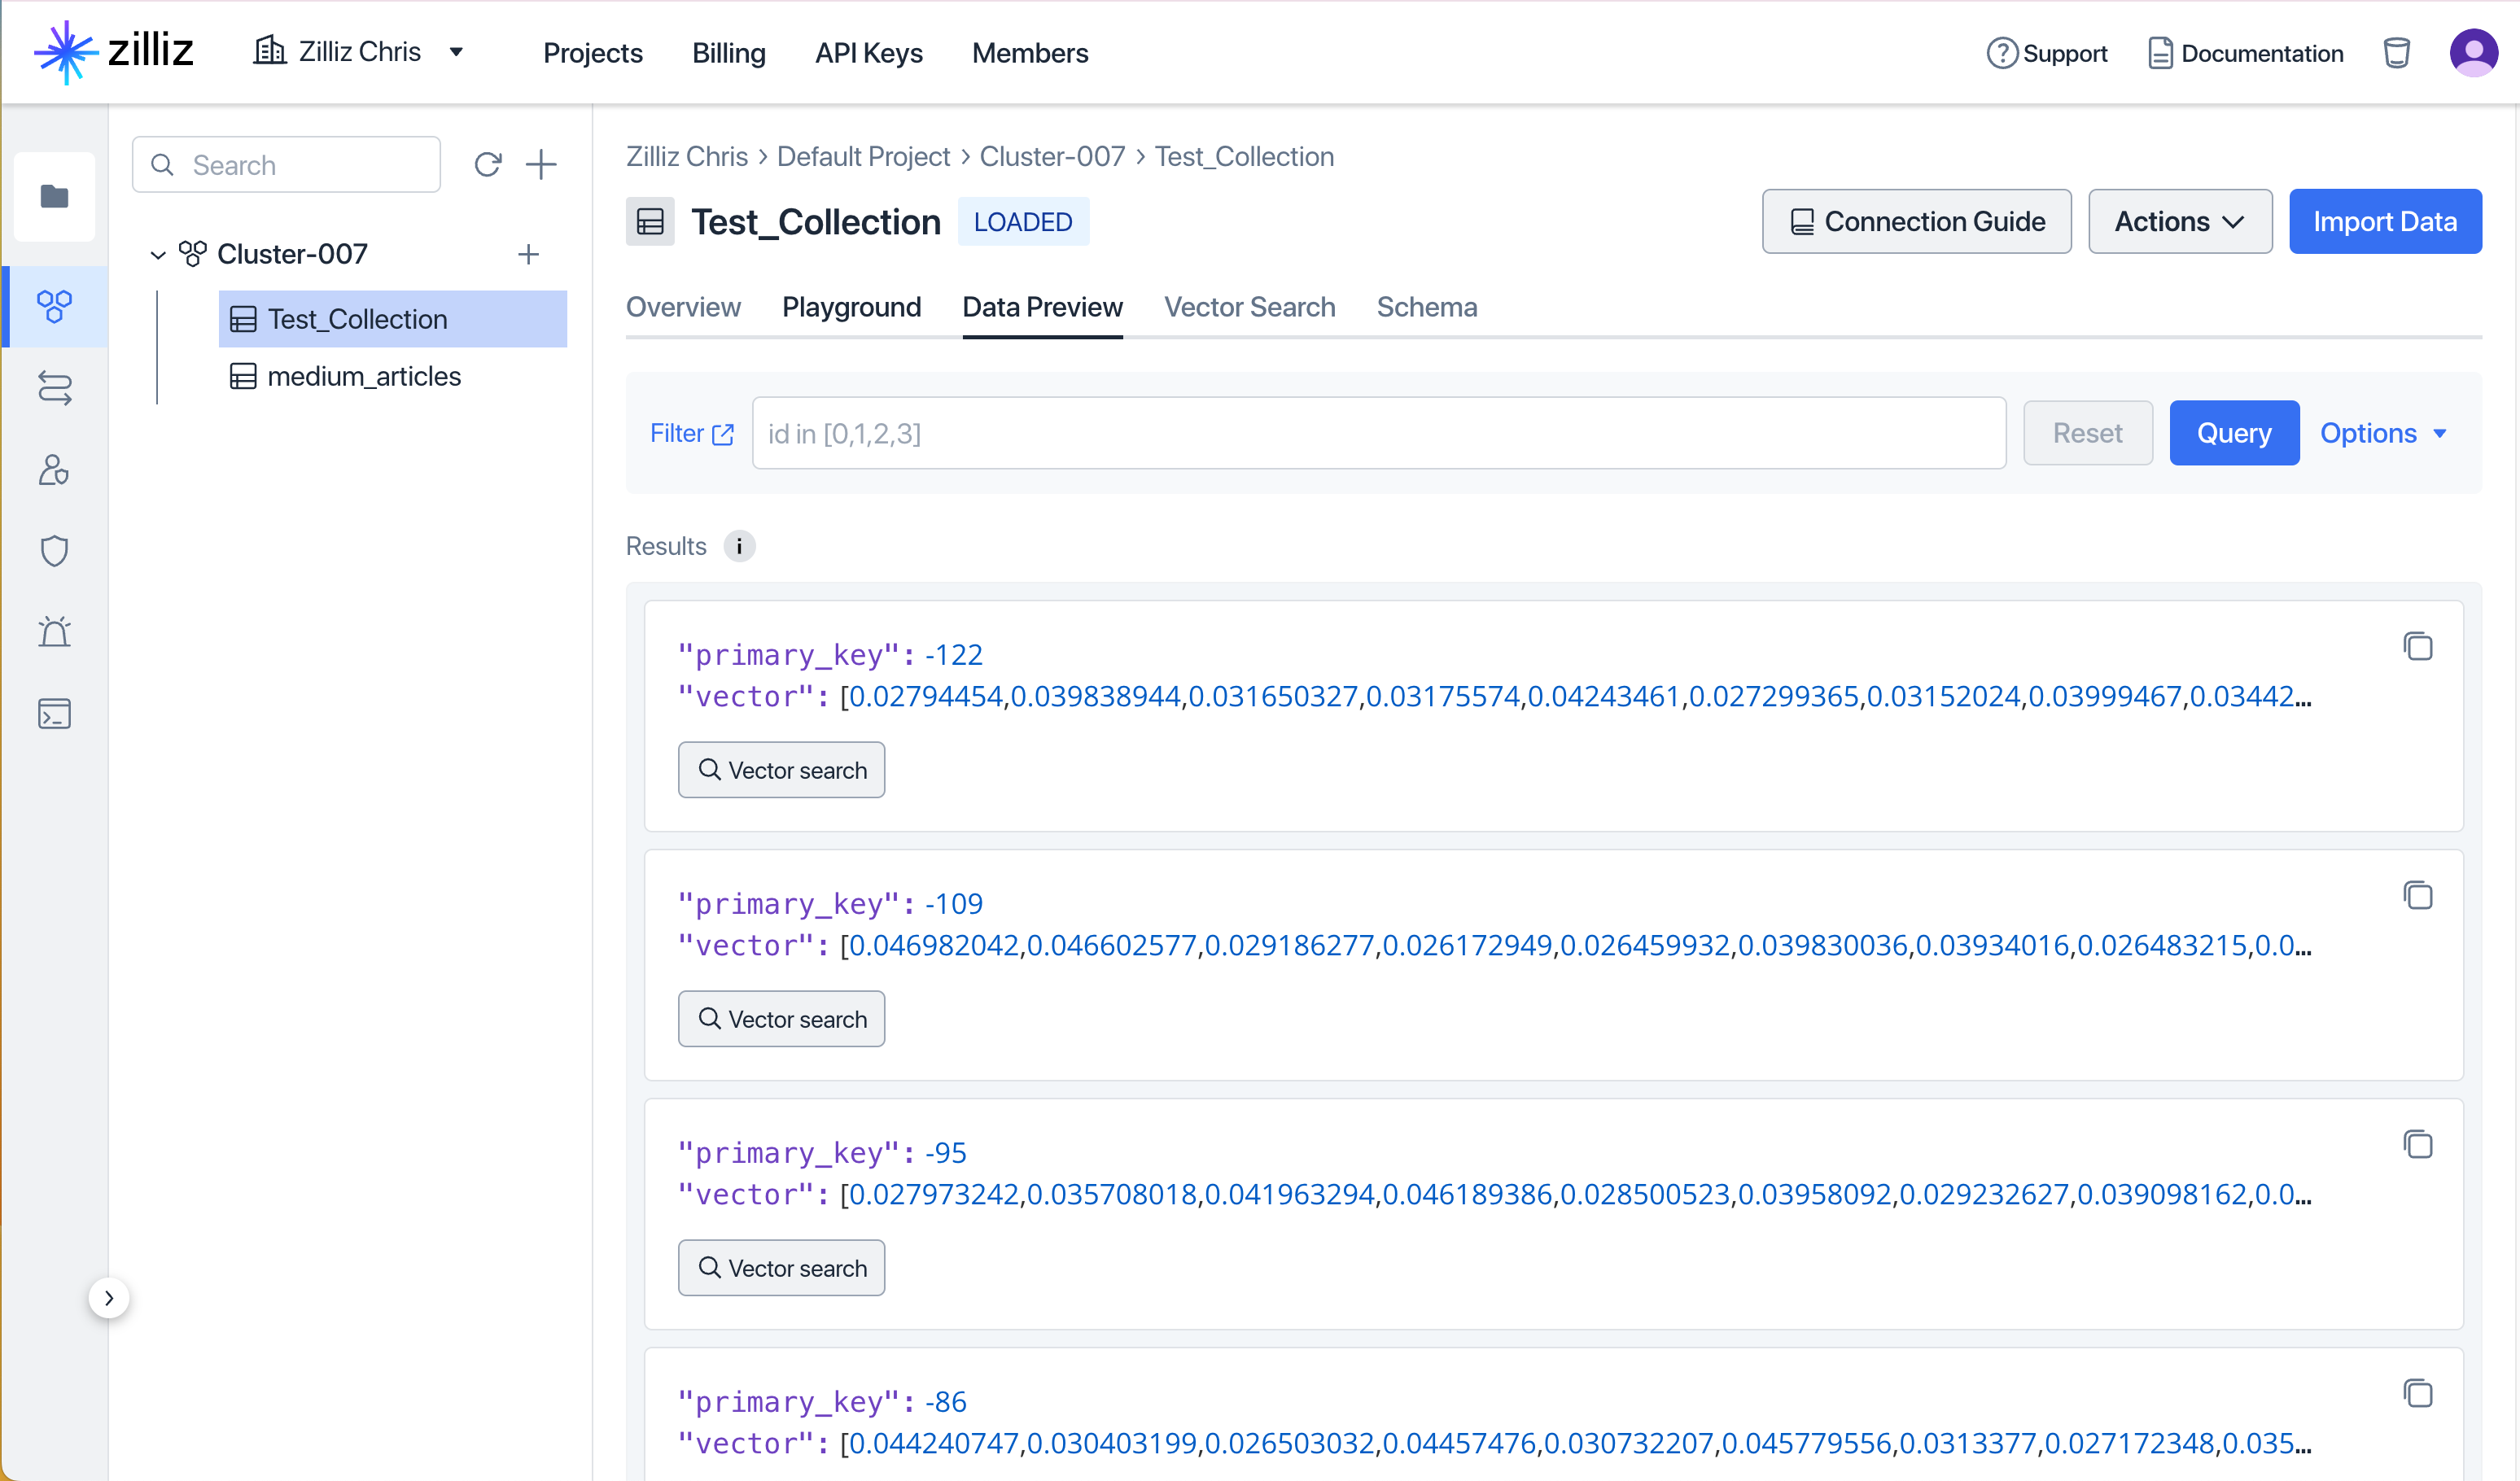
This is just a little sample data to help you play around with the UI. There is a more interesting quick start guide in the documentation that will walk you through creating a collection, inserting data, and doing a search with the python client.
Conclusion
Integrating Zilliz Cloud with Azure Marketplace involves a clear and straightforward process that facilitates seamless access to advanced vector database capabilities within Azure's robust cloud environment.
The steps outlined in this guide (from searching and subscribing to configuring subscription details, linking your account, and setting up billing) ensure a smooth integration experience for all users. This integration simplifies the management of subscriptions and billing and enhances the efficiency with which developers can incorporate Zilliz Cloud into their projects.
With Zilliz Cloud now available on Azure Marketplace, developers, cloud architects, and IT professionals are better equipped to handle large-scale data projects and AI applications with increased ease and efficiency.
What's Next
With Zilliz Cloud now seamlessly integrated into your Azure environment, the possibilities for enhancing your data projects are extensive. We encourage you to explore the full range of capabilities that Zilliz Cloud offers.
Whether you are managing large-scale data sets, engaging in complex AI projects, or needing robust search functionalities, Zilliz Cloud on Azure provides the tools and support necessary to succeed.
We are always looking to improve and adapt our services to meet your needs better. Your feedback and suggestions are invaluable to us. Please feel free to reach out through Azure Marketplace's feedback mechanisms or the Zilliz Cloud portal.
As a token of our appreciation for choosing Zilliz Cloud on Azure Marketplace, we are offering a $100 credit to all new sign-ups. This offer is comparable to the introductory promotions available on platforms like AWS and Google Cloud Marketplaces, providing an excellent opportunity to enhance your projects with additional value.
Take advantage of this offer, explore Zilliz Cloud's features, and let us know how we can support your journey toward more efficient and powerful data management.
Start Free, Scale Easily
Try the fully-managed vector database built for your GenAI applications.
Try Zilliz Cloud for FreeKeep Reading
A Beginner's Guide to Connecting Zilliz Cloud with Google Cloud Platform
A Beginner's Guide to Connecting Zilliz Cloud with Google Cloud Platform
A Beginner’s Guide to Zilliz Cloud on the AWS Marketplace
In this article, we’ll discover how to connect Zilliz Cloud—the world’s leading vector database—with the AWS marketplace.
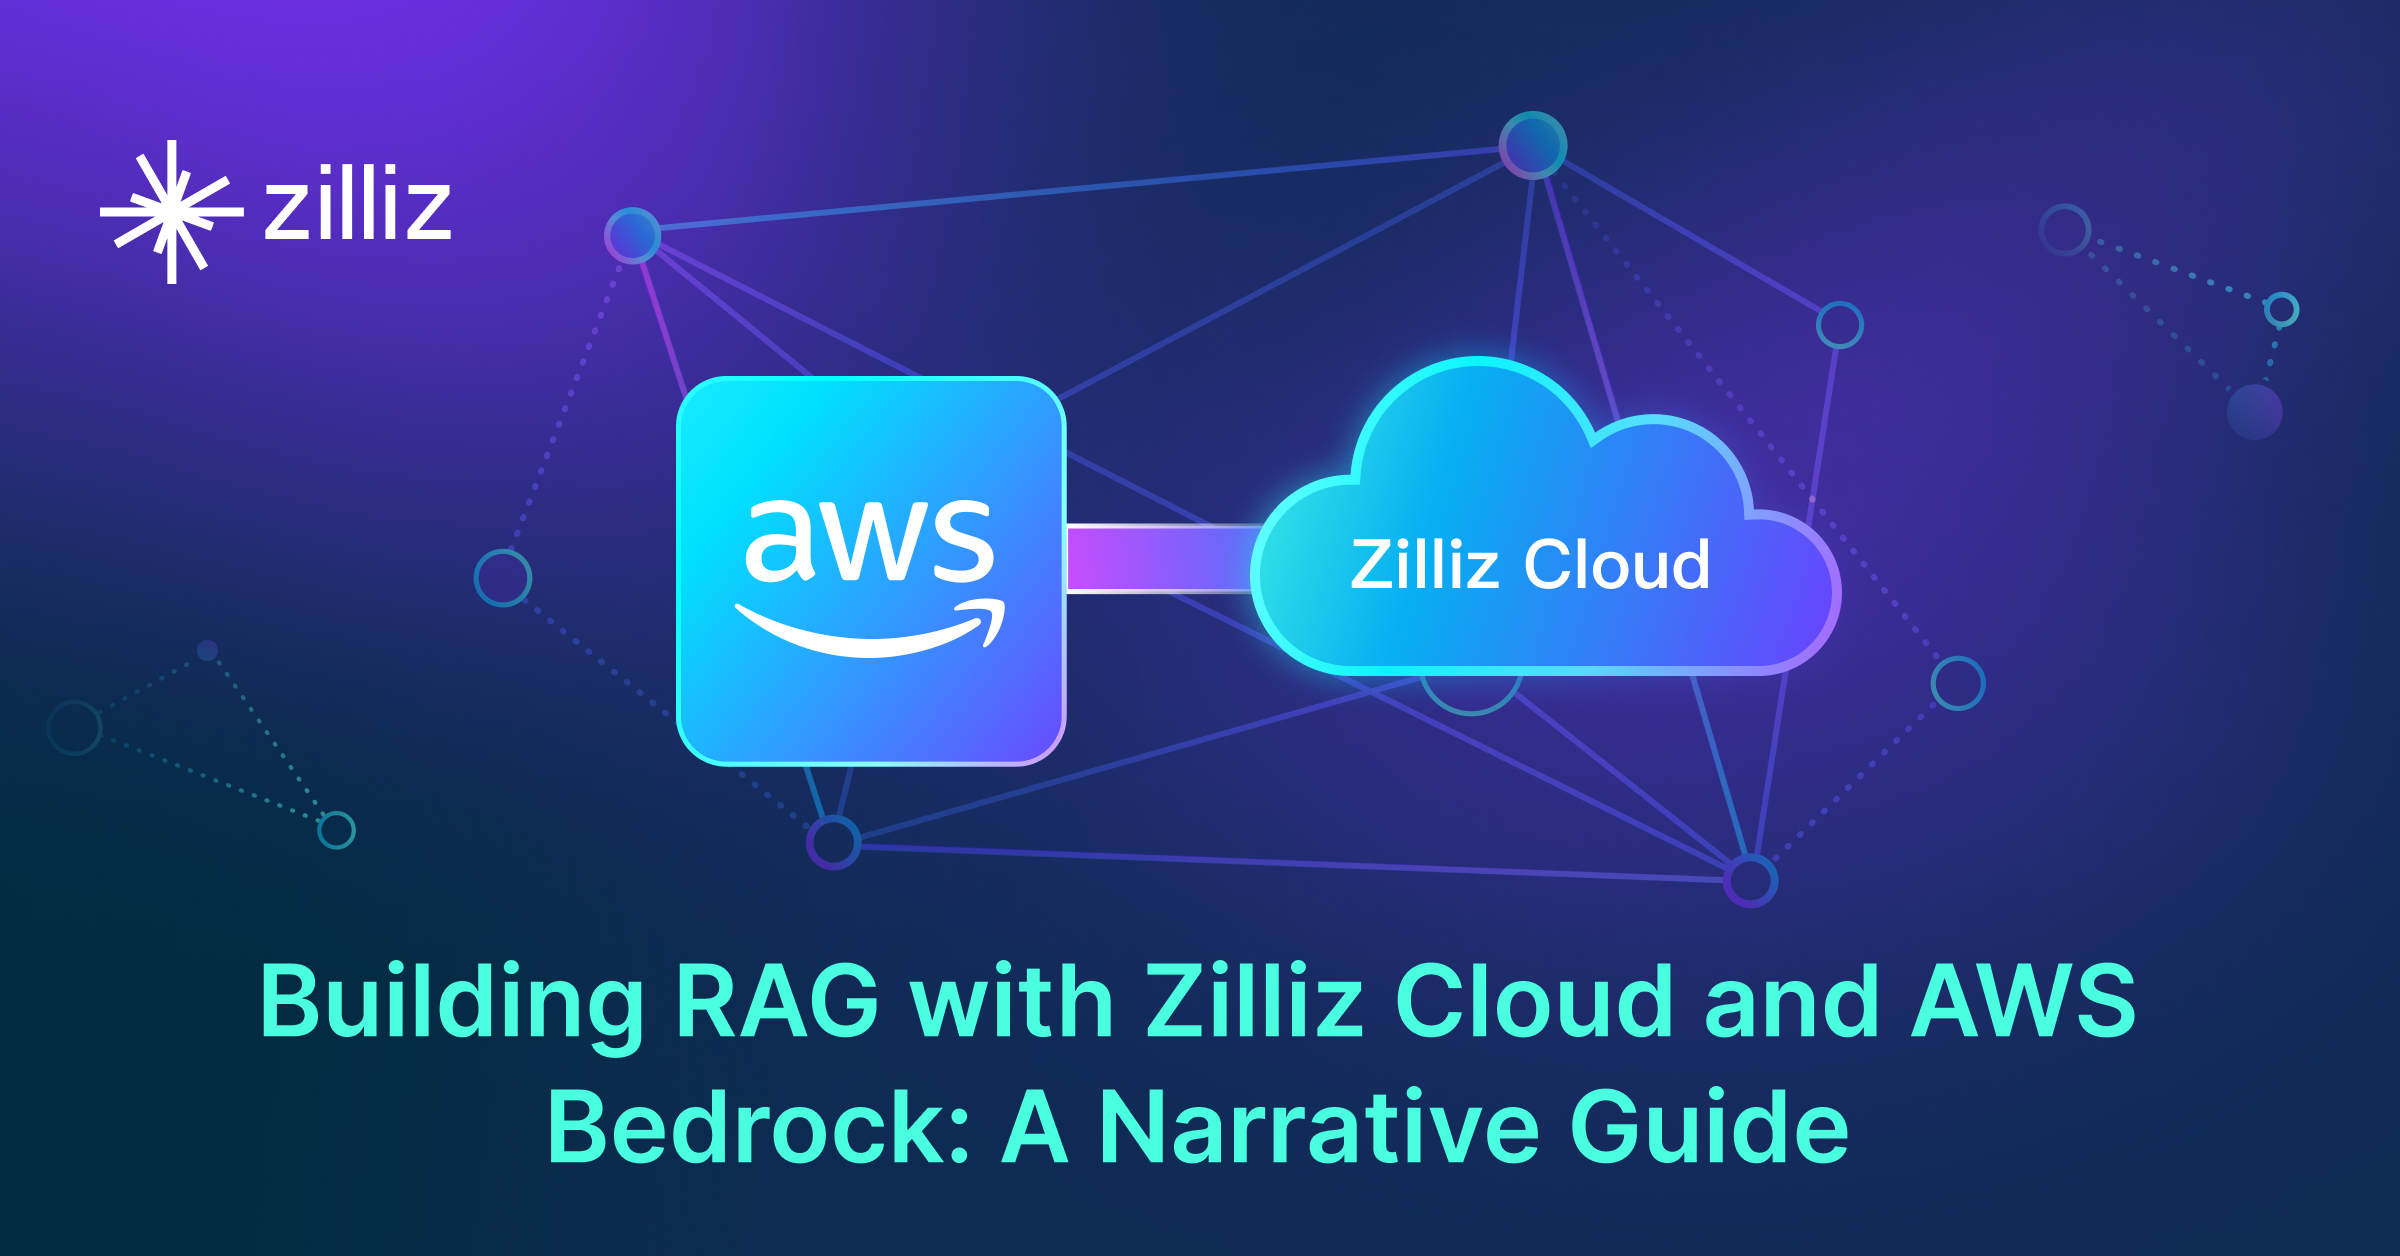
Building RAG with Zilliz Cloud and AWS Bedrock: A Narrative Guide
A comprehensive guide on how to use Zilliz Cloud and AWS Bedrock to build RAG applications
