A Beginner’s Guide to Zilliz Cloud on the AWS Marketplace
In this article, we’ll discover how to connect Zilliz Cloud—the world’s leading vector database—with the AWS marketplace.
The international cloud market is one of the most dynamic and lucrative of the modern age, generating a combined revenue of over $167 billion each year. Of the hyperscalers at the forefront of this service, Amazon Web Services (AWS) represents 48% of the total market share, making it the go-to choice of cloud provider for millions of customers across the globe.
One market segment causing a boom in cloud usage is the high storage and compute needs of artificial intelligence (AI). As businesses increasingly utilize cloud services to host unstructured data for AI applications, they are turning to vector databases. In this article, we’ll discover how to connect Zilliz Cloud—the world’s leading vector database—with the AWS marketplace.
Let’s dive right into this cloud integration.
Getting Started on AWS Marketplace
The AWS Marketplace offers over 10,000 individual products, ranging from data management tools and IoT services to business applications and infrastructure. Customers can find third-party software that allows them to rapidly add new functionality or support to their businesses.
From the AWS Marketplace homepage, customers can browse through each of the core categories and recommended products. Alternatively, if you already know what you’re looking for, you can type in the product name in the search bar at the top of the screen.

Step 1: Search, Subscribe, and Create an Account
Whether you navigate to Zilliz Cloud through the SaaS category or type its name in directly, you’ll find it in the list of suggestions. Look for the icon, name, and description below. Clicking on this will take you to the AWS Marketplace page for Zilliz Cloud.
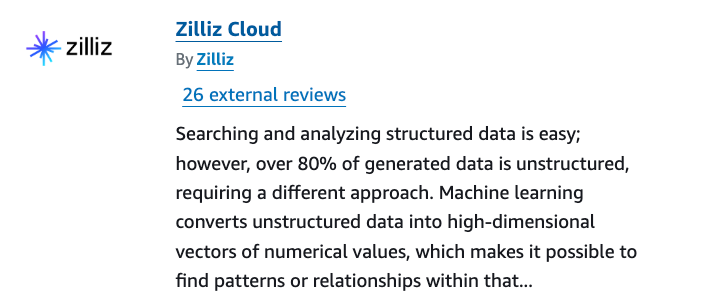
In the top right of your screen, you’ll see a button to “View Purchase Options.” Clicking on this will take you to a checkout screen where you can see the cost of Zilliz Cloud usage.
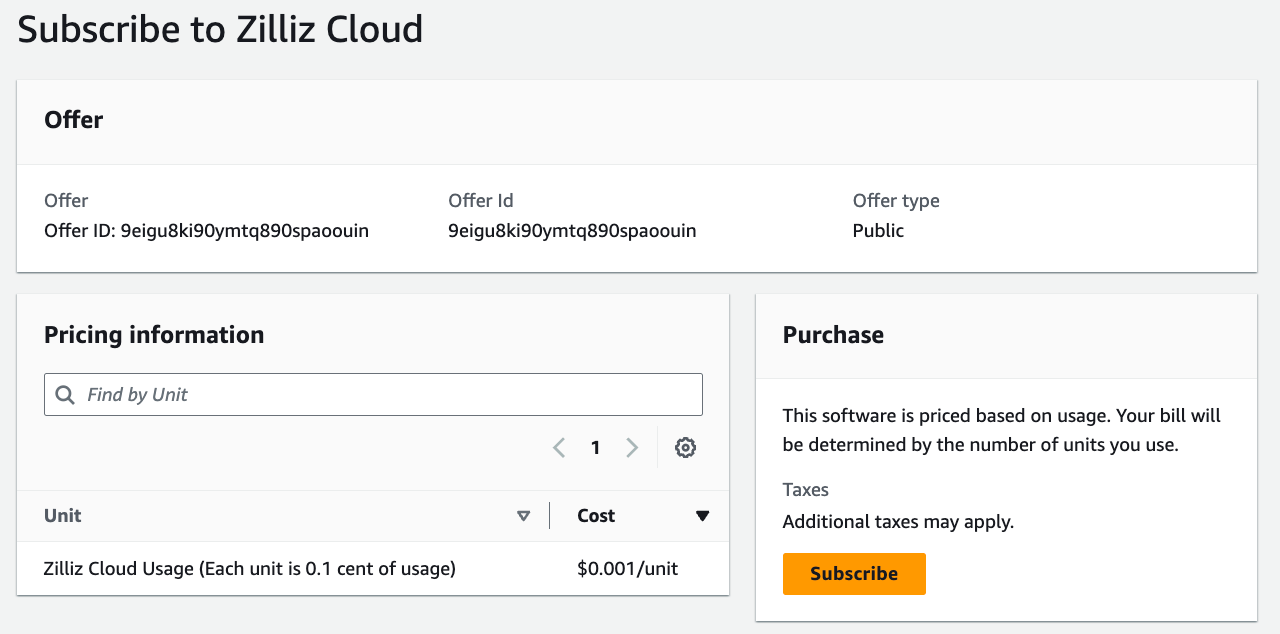
Clicking subscribe will take you directly to the Zilliz home website. If you already have an account, you’ll move directly to stage 2) Link Organization. If not, you’ll need to create an account with Zilliz using your company email. From there, you simply click “Link Organization” to authorize the AWS Marketplace Subscription.

Step 2: Subscription Setup and AWS Configuration
Zilliz Cloud offers a range of tiers and compute types, allowing your business to get the exact support it’s looking for. Zilliz offers scalable pricing across four distinct plans:
- Starter – From $0/month, the Starter plan is a simple yet effective way to experience a fully managed vector database.
- Standard – From $99/month, Zilliz offers the Standard plan for teams with under 5 engineers that need support for complex workloads.
- Enterprise – From $155/month, the Enterprise plan is for at-scale organizations that have comprehensive security and functionality needs.
- Bring Your Own Cloud (BYOC) – The final plan extends upon the Enterprise plan and is perfect for organizations that want to prioritize regulatory adherence and data privacy.
Each marketplace, like Azure, GCP, and AWS Marketplace, offers different pricing terms. When connecting Zilliz Cloud with AWS, you can expect the following prices on the standard plan:
1 AWS performance-optimized CU per hour as one unit: $0.159
1 AWS capacity-optimized CU per hour as one unit: $0.159
1 GB for storage on AWS per month as one unit: $0.025
1 GB for backup service on AWS as one unit: $0.025
You can access the following prices on the Enterprise Plan:
1 AWS performance-optimized CU per hour as one unit: $0.248
1 AWS capacity-optimized CU per hour as one unit: $0.248
1 GB for storage on AWS per month as one unit: $0.025
1 GB for backup service on AWS as one unit: $0.025
Cloud services will vary across different regions and providers. For more information on how much your subscription may cost and the full range of features included in each plan, you can browse the Zilliz Cloud Pricing Page.
When billing through AWS Marketplace, the charges you incur from a third-party product become part of your AWS bill. This automated billing service provides full continuity for your business products, mitigating the possibility of downtime interrupting your operations.
Be sure to check that your “Billing” section is set to AWS Marketplace.

Step 3: Deploying Zilliz Cloud Services
After you’ve successfully integrated your Zilliz Cloud account with your AWS projects, you can then access the Zilliz Cloud console within AWS. From there, you can choose your cluster configuration, create a cluster and deploy it.
To facilitate efficient cluster connections, Zilliz offers four SDK options: Go, Node.js, Java, and Python. Different providers offer distinct functionality and performance attributes.
 get started to explore zilliz cloud.png
At this stage, it’s important to take note of various Network & Security practices that you can implement. For example, you could set up a whitelist to reduce the number of IP addresses that can access your project’s clusters. Additionally, you can create and use a private link to form direct access to your cluster, avoiding connections over the internet.
Zilliz adheres to cloud IAM standards, ensuring data is encrypted in transit and at rest and that your business can effectively control data access permissions.
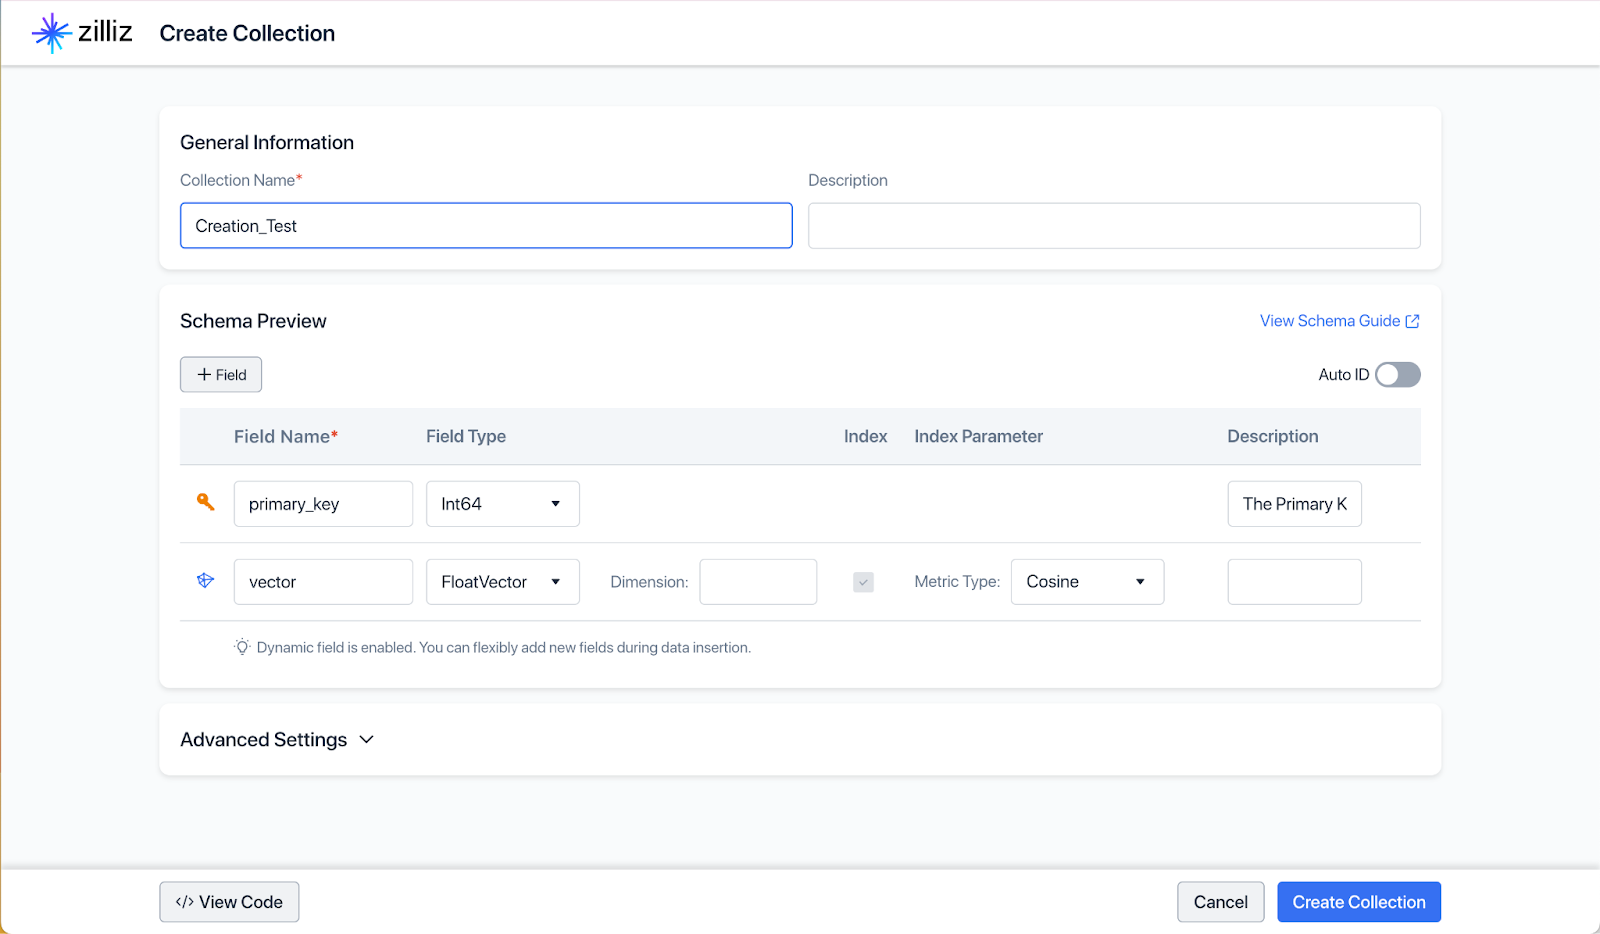
Once you have created a cluster, create a collection by clicking on the “+ Collection” button. Once you do that, this screen will appear:
 create collection.png
Leave the primary_key as is, and change the dimensions for the vector entity to 768. The vector field is also set using the “Cosine” metric type and in the “Advanced Settings” you can choose whether the field is fixed or dynamic; and for this collection we will just leave those default settings. Name your collection and click on the “Create Collection” button.
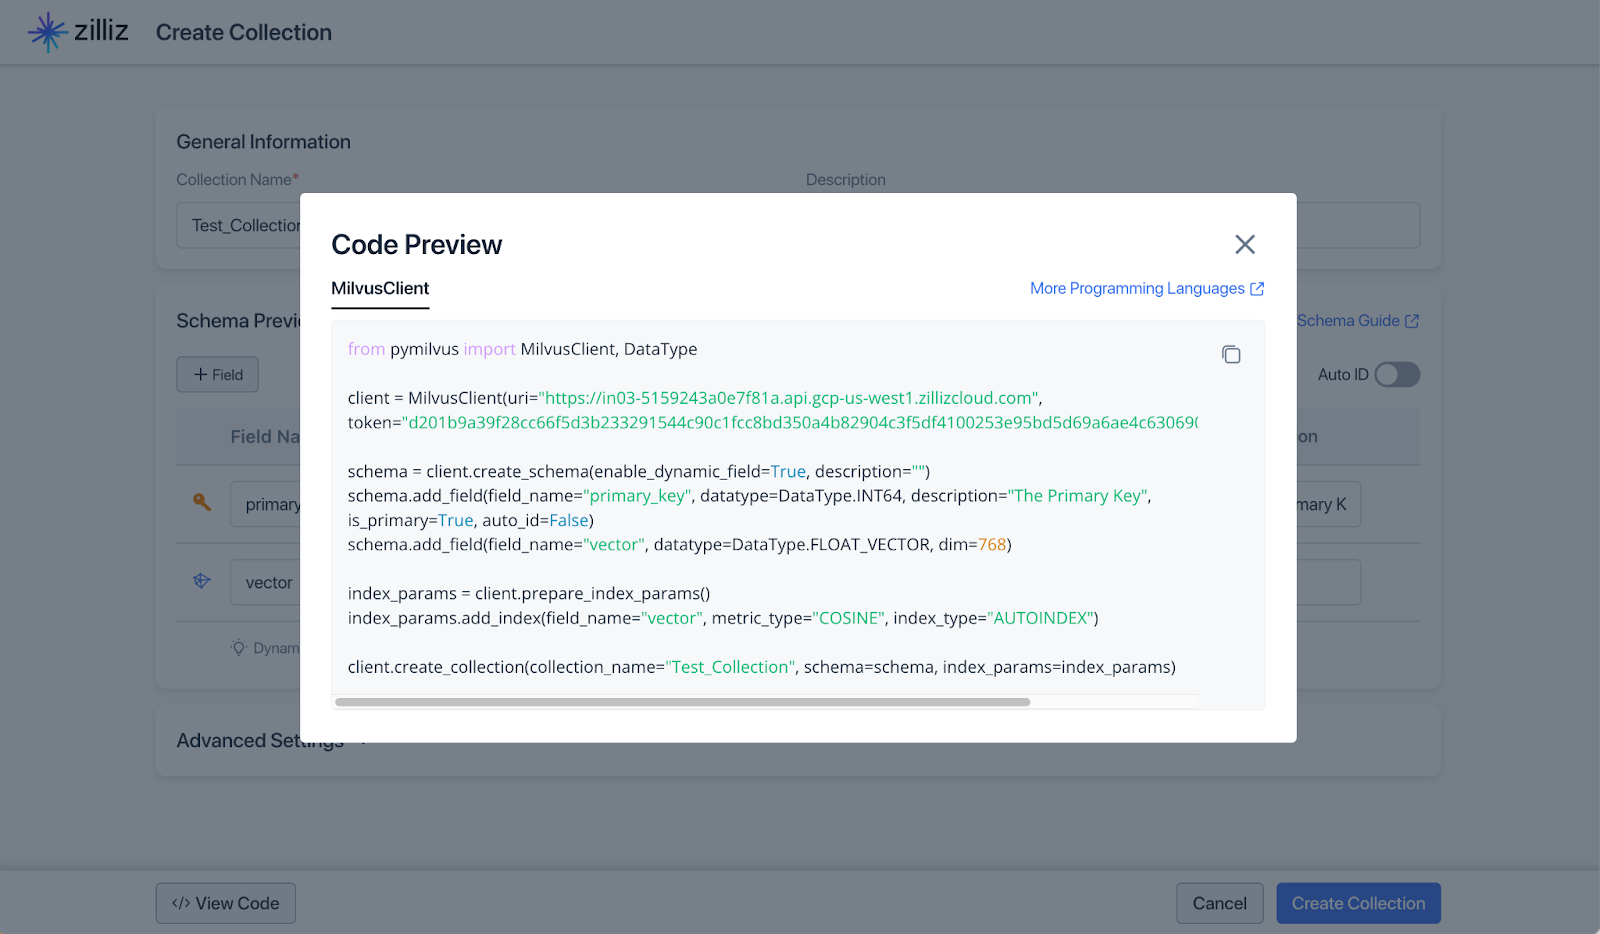
You can also grab the code snipped if you want to create the collection with PyMilvus by clicking on “View Code.”
 code preview.png
Once the collection is created, click on the “Import Data” button and download the Example data titled “example.json.” This example data just has a primary key and embeddings and no meta data to filter on. Once downloaded, upload the data into your collection by following the instructions in the UI.
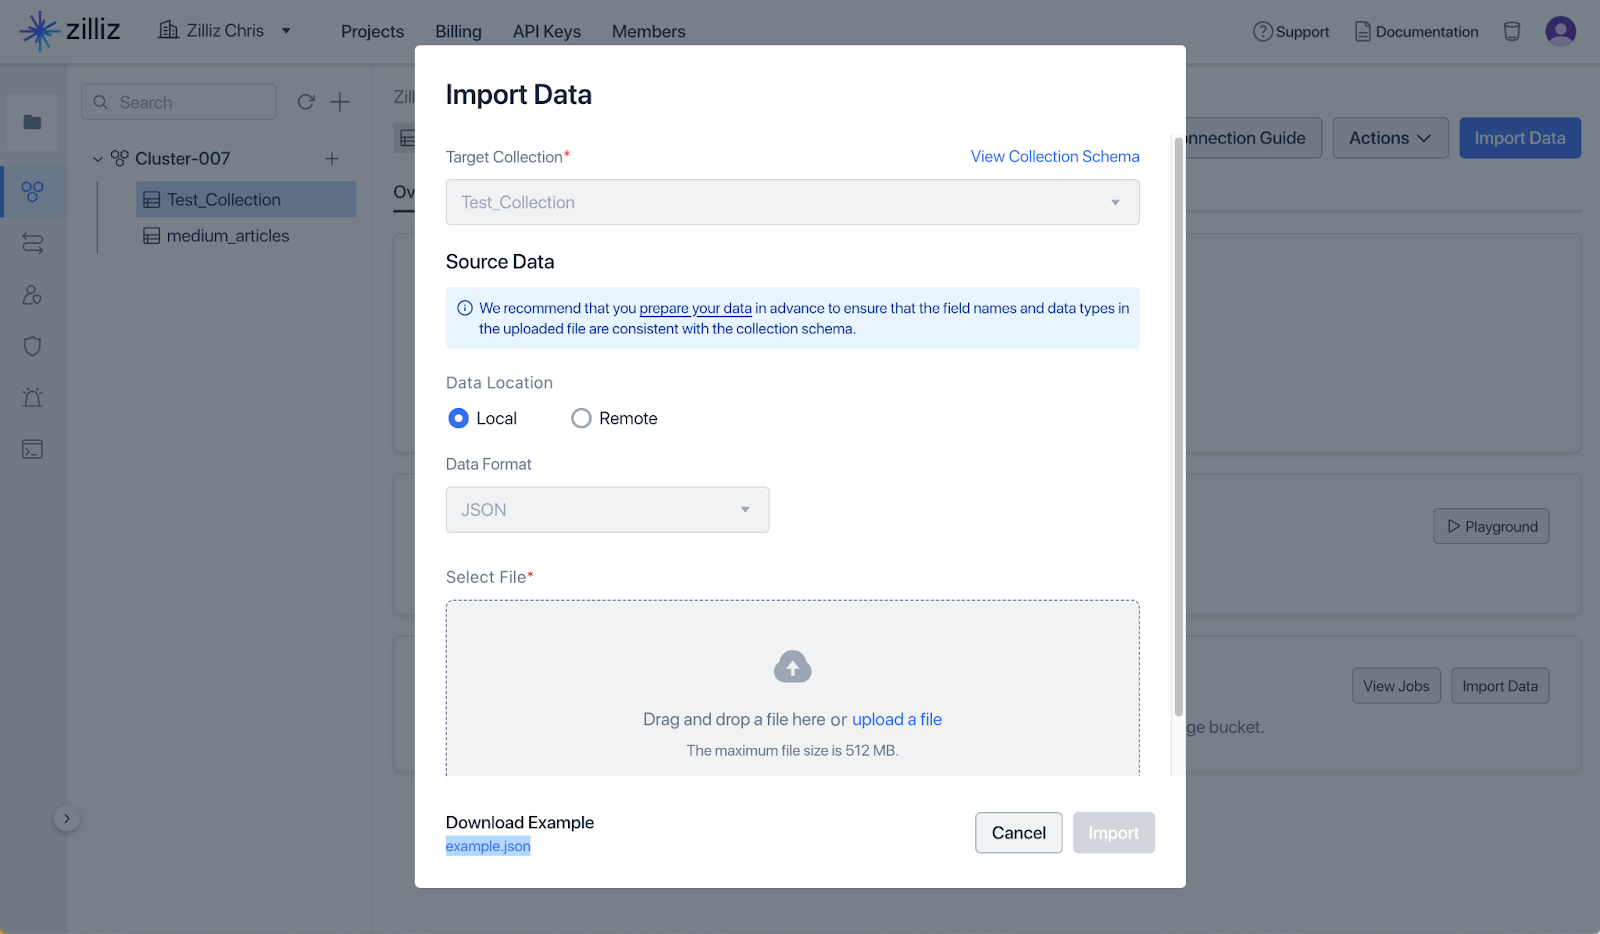
Once you have data in your collection, go to the “Data Preview” tab to take a look at the data. You can play around with the search capabilities just to get a sense of what is available in the UI in the “Vector Search” tab.
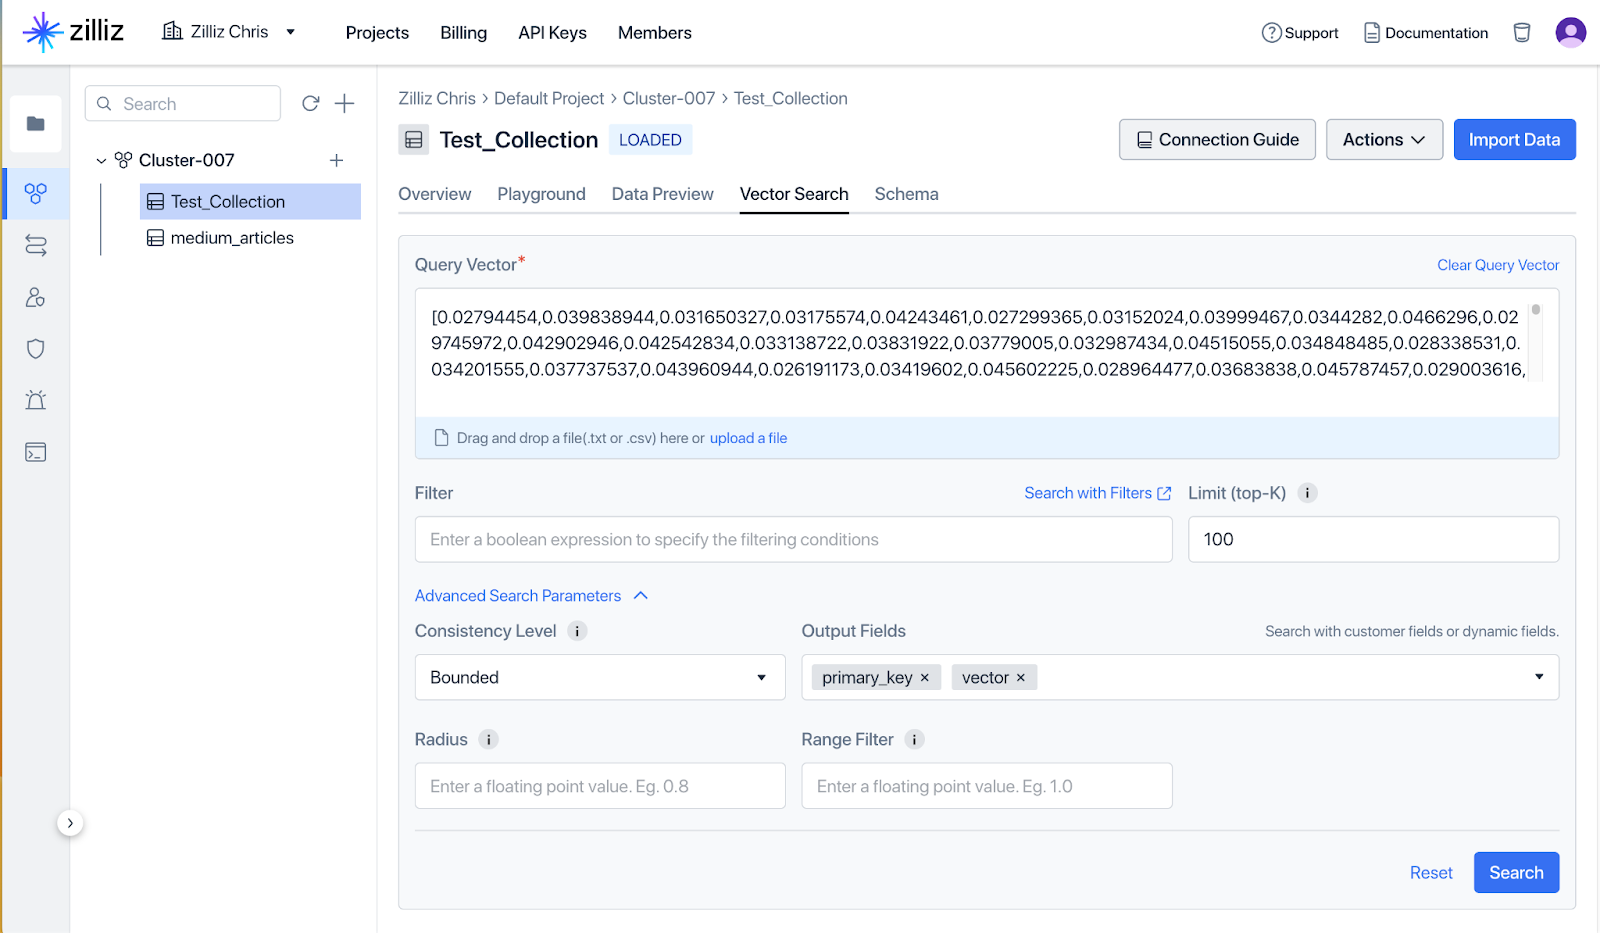
This is just a little sample data to help you play around with the UI. There is a more interesting quick start guide in the documentation that will walk you through creating a collection, inserting data, and doing a search with the python client.
Conclusion
By following these easy steps – finding Zilliz in the AWS Marketplace, confirming your subscription, linking your AWS account, and deploying Zilliz cloud services – you will have successfully created a subscription to Zilliz Cloud on the AWS Marketplace.
As a highly scalable, easy-to-use system, leveraging AWS Marketplace is a powerful way to integrate Zilliz Cloud’s vector database capabilities into your existing AWS environment. This approach enables you to minimize downtime and rapidly construct the architecture you need for innovative applications.
What’s Next?
If you’re just getting started with using Zilliz Cloud for your AWS projects, we recommend you browse through our knowledge hub. With advanced tutorials, extensive community forums, and on-demand technical support, you’ll find all the information you need to create scalable vector search storage.
Learn more about AWS and Zilliz, or get started with a free trial today.
- Getting Started on AWS Marketplace<a id="getting-started-on-aws-marketplace"></a>
- Step 1: Search, Subscribe, and Create an Account
- Step 2: Subscription Setup and AWS Configuration
- Step 3: Deploying Zilliz Cloud Services
- Conclusion
- What’s Next?
Content
Start Free, Scale Easily
Try the fully-managed vector database built for your GenAI applications.
Try Zilliz Cloud for FreeKeep Reading
A Beginner's Guide to Connecting Zilliz Cloud with Google Cloud Platform
A Beginner's Guide to Connecting Zilliz Cloud with Google Cloud Platform
A Beginner's Guide to Connecting Zilliz Cloud with Azure Marketplace
A Beginner's Guide to Connecting Zilliz Cloud with Azure Marketplace
Building RAG with Zilliz Cloud and AWS Bedrock: A Narrative Guide
A comprehensive guide on how to use Zilliz Cloud and AWS Bedrock to build RAG applications
