A Beginner's Guide to Connecting Zilliz Cloud with Google Cloud Platform
A Beginner's Guide to Connecting Zilliz Cloud with Google Cloud Platform
What is Zilliz Cloud?
Zilliz Cloud, a cloud-native vector database solution, addresses this challenge by providing storage, indexing, and searching capabilities for billions of vector embeddings. This cloud computing solution enables enterprise-grade recommendation systems, similarity search, anomaly detection, AI agents, and more. Built on the popular open-source vector database Milvus, Zilliz Cloud seamlessly integrates with vectorizers from industry leaders like OpenAI, Cohere, and HuggingFace, facilitating technology integration with other popular models. By solving the complex challenge of managing billions of embeddings, Zilliz Cloud simplifies the development of scalable applications that deliver enhanced personalization experiences.
Getting Started on the Google Cloud Platform (GCP)
Here we'll use our Google account to create a Google Cloud subscription.
 get started with gcp
Step 1: Set up a Google Cloud Zilliz subscription
(a) Go to Google Cloud Console at https://console.cloud.google.com.
Note: If you are already signed into Google Cloud and have an ongoing subscription to Google Cloud, you can skip down to "Step 2: Zilliz Cloud Subscription" below.
(b) Here you will be prompted to choose which Google account you will use or add one.
(c) Once you choose your Google account, you will be prompted to log in.
(d) Next, you will see a window pop up titled "Google Cloud" and "Welcome [your name]!".
(e) Confirm your Country and check the box under "Terms of Service".
(f) Choose your Google account and/or fill in the necessary account information and click the "Agree & Continue" button.
(g) You will now see a screen with a title that begins with "Try Google Cloud..." and a "Try for Free" button. Press this button.
(h) Now you will see the "Step 1 of 2 Account Information" page where you will again verify your Country and click the "Agree & Continue" button at the bottom.
(i) Next, you will see a page titled "Step 2 of 2 Payment Information Verification" where you can verify your payment information and then click the "Start Free" button at the bottom.
(j) After a short pause, a new message will pop up with the title "Welcome [your name]!" In this popup you will be presented with four questions to answer. With each of the following questions, choose an answer and press the "Next" button:
What best describes your organization or needs?
What brought you to Google Cloud?
What are you interested in doing with Google Cloud?
What best describes your role?
After you have answered the final question, click the "Done" button.
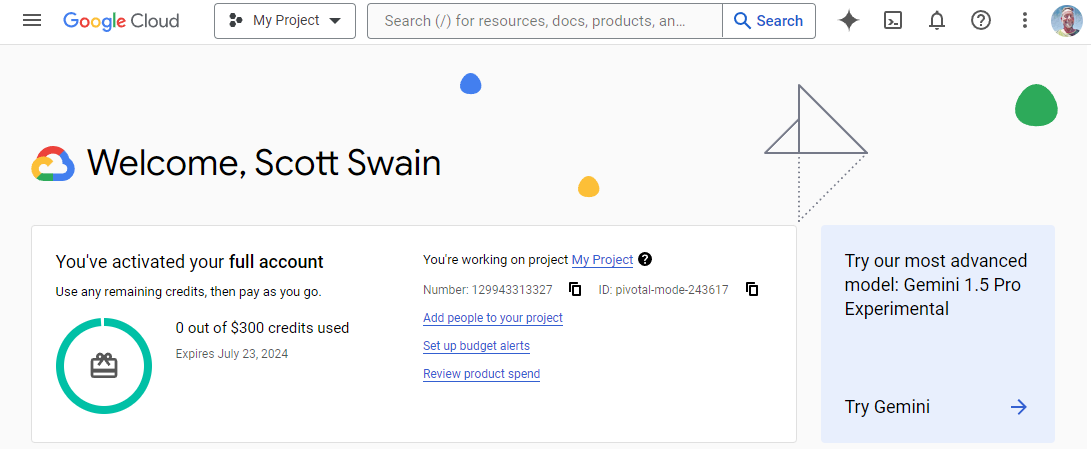
Now you will find yourself back on the "Google Cloud" home screen where you began. Notice at the top of the screen: A dropdown-looking button with "[your project name]." If you click that box, a window will pop up where you can search through your projects and – if you have others – activate them.
Step 2: Set up a Zilliz Cloud subscription on GCP

Now that you are subscribed to Google Cloud, if you are not at the Google Cloud Marketplace screen or other screen with a "Search Marketplace" search box near the top, you can go directly there via https://console.cloud.google.com.
(a) Type "Zilliz Cloud" into the search box.
(b) In search results, click on "Zilliz Cloud" to select it.
(c) A new page will come up with "Product details" and "Zilliz Cloud" at the top. Notice, but skip, the "Subscribe" button for now. Before you press that button, you may want to read the area below marked "Overview" and the area below that with the "Pricing" heading.
(d) When you are satisfied with what you see here about how the easily integrated vector database capabilities of Zilliz Cloud can work for your project(s), click the "Subscribe" button.
(e) Now you will see a screen titled "New Zilliz Cloud subscription".
(f) "1. Select Plan" will have "Pay as you go" selected and not changeable.
(g) Under "Pricing," notice the usage fee.
(h) Next, under "2. Purchase details," you can select a billing account.
(i) Finally, under "3. Terms," check the box under "Additional terms" and click "Subscribe" to start your Zilliz Cloud Subscription.
At this point you should see a message pop up with the heading "Your order request has been sent to Zilliz" and two links at the bottom; "Manage Orders" and "Sign up with Zilliz."
(j) Click "Sign up with Zilliz" to set up the necessary account on the Zilliz Cloud platform.
Step 3: Register your new Zilliz account
(a) A new window should have popped up titled "Authorize GCP Marketplace Subscription". Choose the same account you used in Step 1 above and click the "Log In" button.
(b) Depending on which form (Google or other) or account you used, you may need to go through one or two confirmation screens.
(c) When you get to a screen titled "Zilliz" at the top and then "Accept Terms of Service and Privacy Policy," check the box that begins with "I understand and agree," and press the "Submit" button.
(d) Here you may be asked to confirm your [Google] account. Do so.
(e) Now, a screen titled, "Welcome to Zilliz Cloud!" will appear.
(f) Enter your name, Country, and Company and press the "Create Account" button. You may need to wait a moment while your account information processes.
(g) Next, you will see the "Authorize GCP Marketplace Subscription" screen again but with stage 2, "Link Organization" at the top. Make sure you recognize the "Organization Name" and press the "Link Organization" button.
(h) Finally, stage 3, "Complete Authorization" shows at the top, along with "Authorization Completed." Press the "Enter Zilliz Cloud" button.
Step 4: Finishing Zilliz Cloud setup
Now you will see your Zilliz control panel screen with Projects, Billing, API Keys, Members, Organizational Alert, Activities, Settings, and Recycle Bin on the left side of the screen.
Create a new project
 Create a new project.png
(a) Click on Projects to see the "Projects" screen. Click the "+ Project" button on the top right.
(b) In the popup, name your project and click "Create." You may need to wait a moment while your new project is set up. Once it is, you will be back on the "Projects" screen and see your new project occupies a row on that screen.
Take note that the 3-dot menu to the right of your new project's row allows you to rename or delete your project.
(c) Click on the name of your project. Here is where you would create a cluster, create a collection, import data, and start a vector search. Click "Projects" at the top to get back to the main console.
Create a cluster
 Create a cluster
(a) Navigate to "Clusters" on the left menu.
(b) Click the "+ Create Cluster" button. Go with the "Starter" cluster and give your cluster a name.
(c) Choose "Google Cloud Platform" as the cloud provider.
(d) Choose a region.
(e) Click the "Create" button at the bottom.
(f) A popup window with the title "Cluster is Being Created...". It will show a user name and password. Copy these and put them in a safe place. You can also download them using the button.
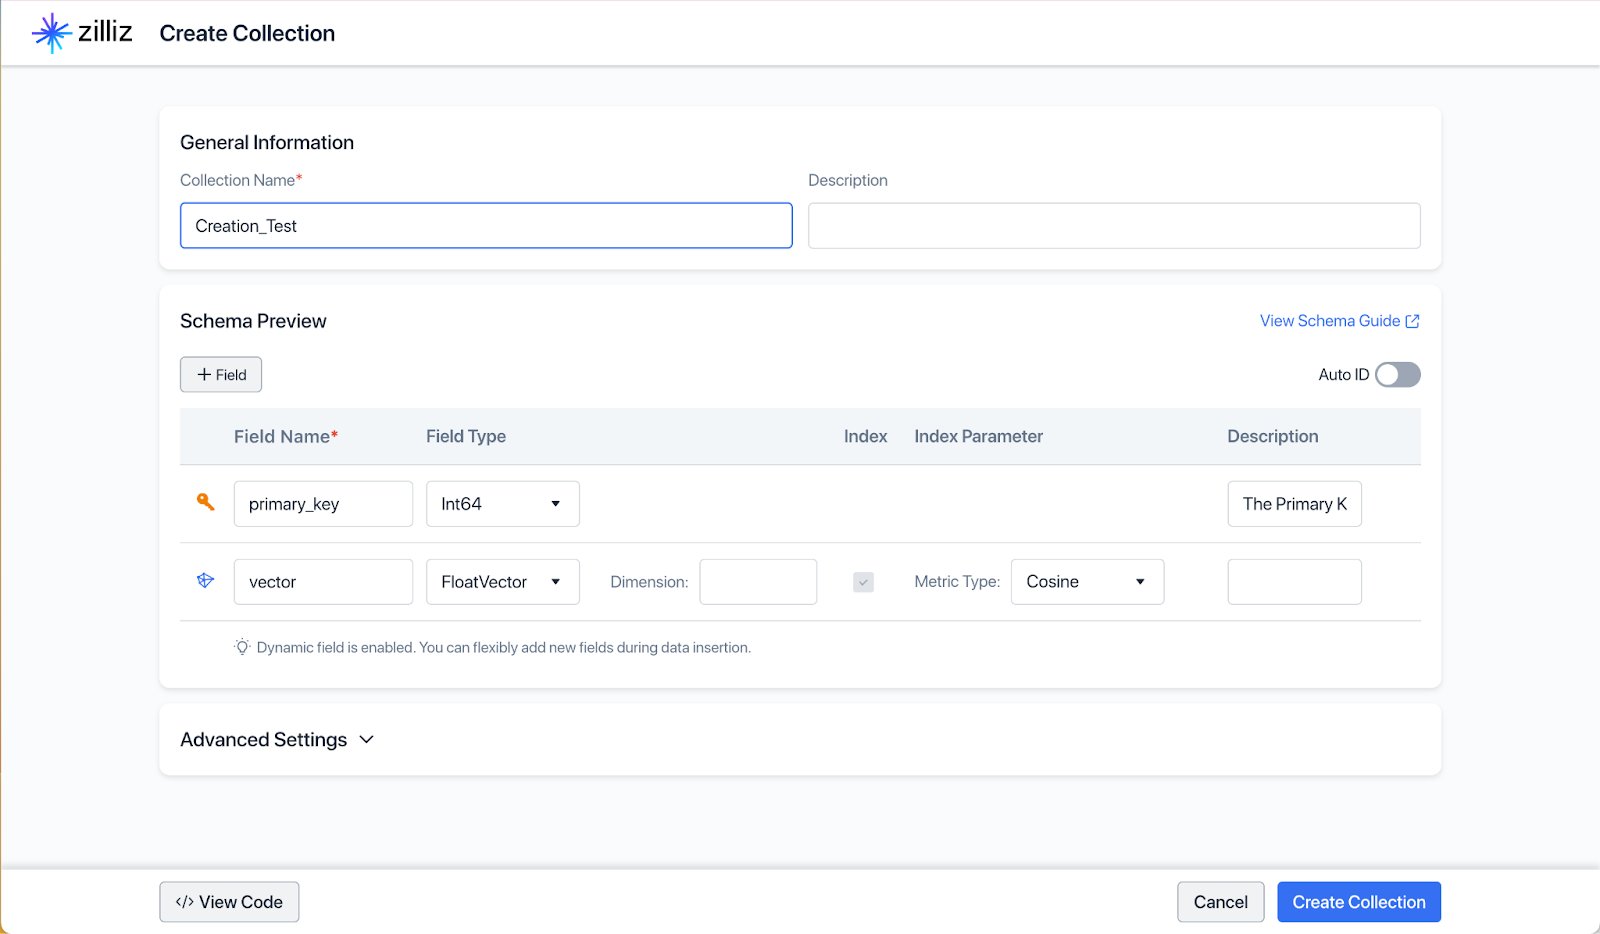
Now that you have a cluster created, let’s go ahead and create a collection by clicking on the “+ Collection” button. Once you do that, this screen will appear:
 create a collection
Leave the primary_key as is, and change the dimensions for the vector entity to 768. The vector field is also set using the “Cosine” metric type and in the “Advanced Settings” you can choose whether the field is fixed or dynamic; and for this collection we will just leave those default settings. Name your collection and click on the “Create Collection” button.
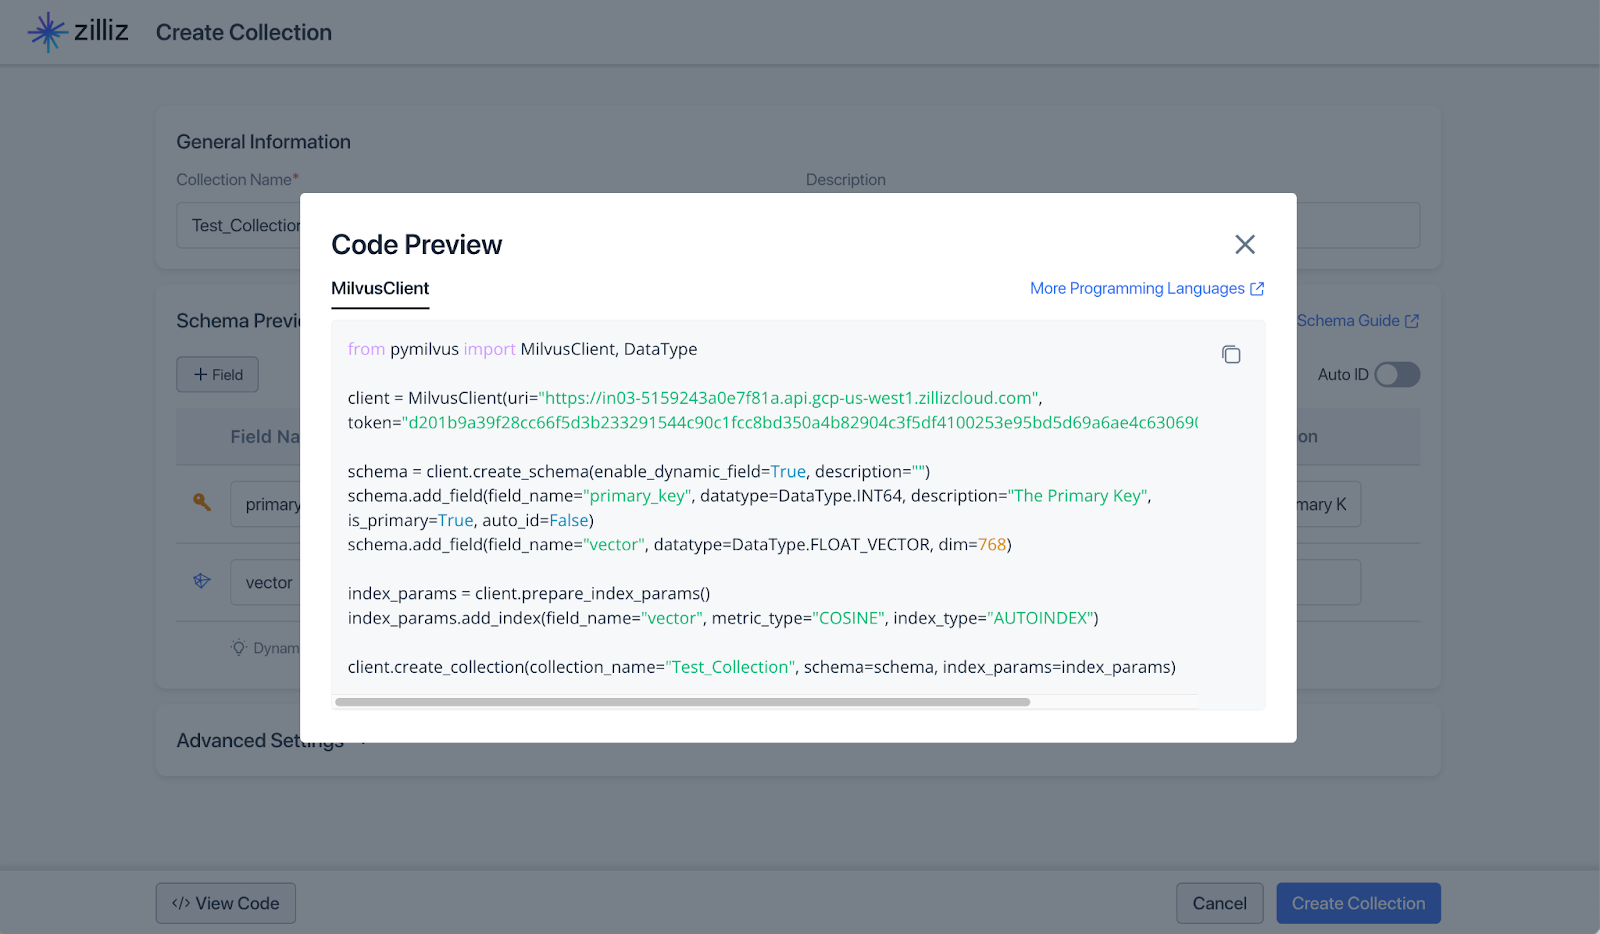
You can also grab the code snipped if you want to create the collection with PyMilvus by clicking on “View Code.”
 create the collection with PyMilvus.png
Once the collection is created, click on the “Import Data” button and download the Example data titled “example.json.” This example data just has a primary key and embeddings and no meta data to filter on. Once downloaded, upload the data into your collection by following the instructions in the UI.
 Import Data
Once you have data in your collection, go to the “Data Preview” tab to take a look at the data. You can play around with the search capabilities just to get a sense of what is available in the UI in the “Vector Search” tab.
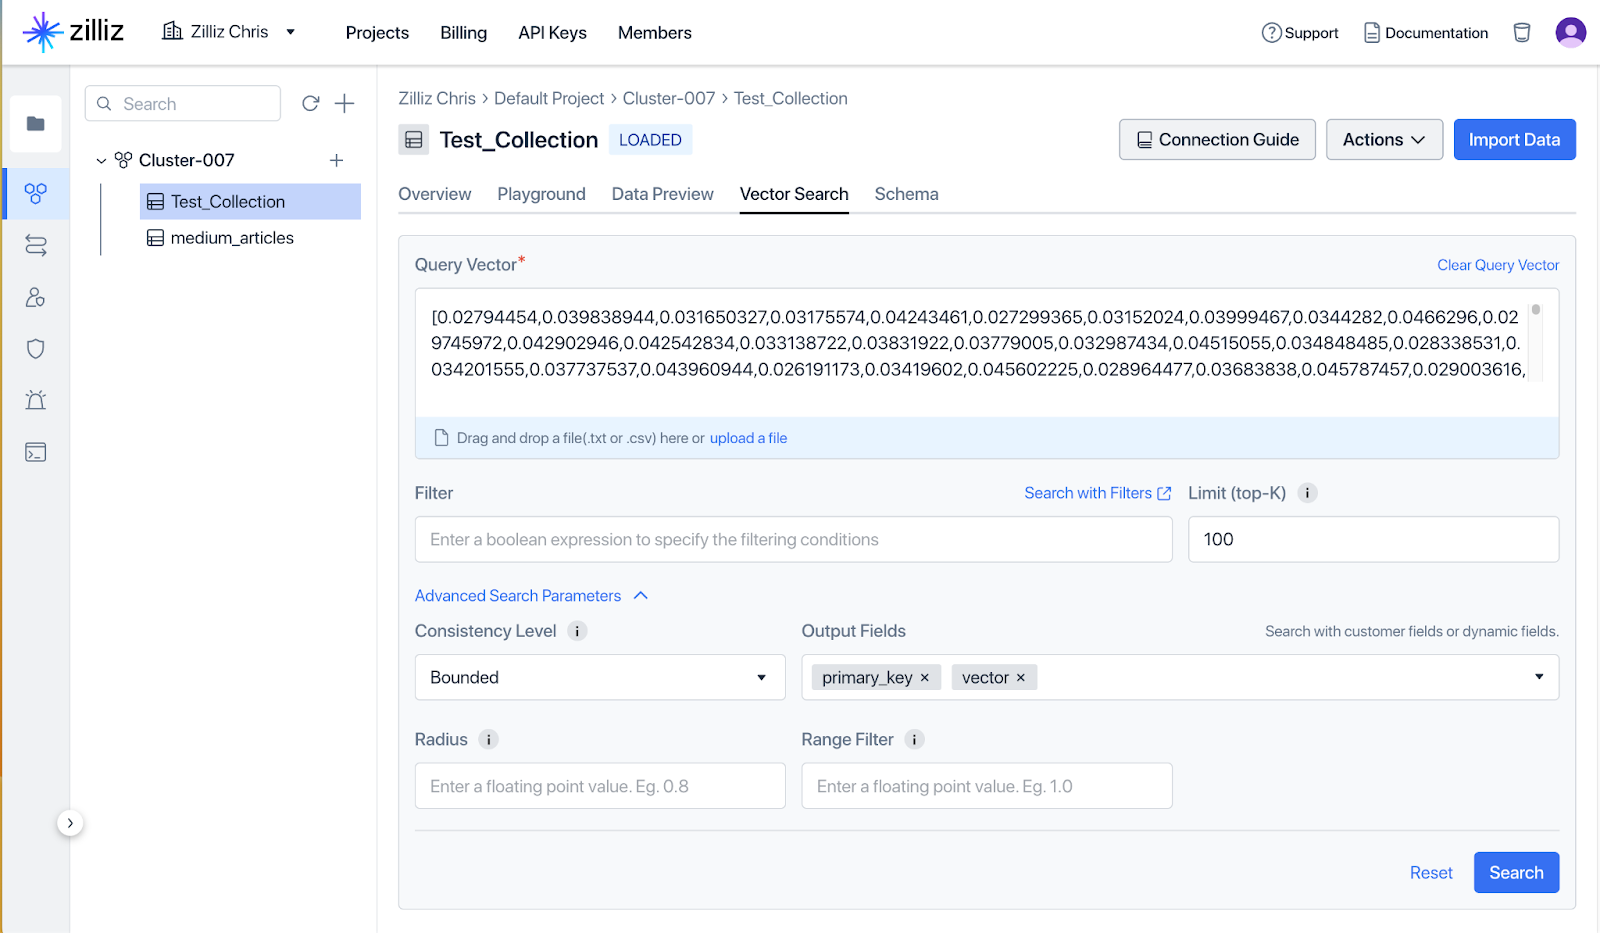 Data Preview
This is just a little sample data to help you play around with the UI. There is a more interesting quick start guide in the documentation that will walk you through creating a collection, inserting data, and doing a search with the python client.
Recap & Benefits
The simple 4-step integration process we learned above allows users of Google Cloud to make use of Zilliz's unique offerings in the area of handling large volumes of unstructured data. Some potential use cases include but are not limited to:
Machine Learning and AI Projects.
Recommendation Systems.
Anomaly Detection.
Search Engines.
Content Management Systems.
Healthcare and Life Sciences.
What’s Next
As of this writing, both Google Cloud Platform and Zilliz Cloud have free starter plans with generous resources provided, so there is nothing holding you back from diving in to discover the many ways Zilliz Cloud can provide the ease and efficiency you need.
Learn More
Using Zilliz Cloud
Quickstart guide for developers
Events (trainings, meet ups, and webinars)
Other resources (whitepapers, webinars, and trainings)
Google Cloud Platform
- What is Zilliz Cloud?
- Getting Started on the Google Cloud Platform (GCP)
- Recap & Benefits
- What’s Next
- Learn More
Content
Start Free, Scale Easily
Try the fully-managed vector database built for your GenAI applications.
Try Zilliz Cloud for FreeKeep Reading
A Beginner’s Guide to Zilliz Cloud on the AWS Marketplace
In this article, we’ll discover how to connect Zilliz Cloud—the world’s leading vector database—with the AWS marketplace.
A Beginner's Guide to Connecting Zilliz Cloud with Azure Marketplace
A Beginner's Guide to Connecting Zilliz Cloud with Azure Marketplace
Building RAG with Zilliz Cloud and AWS Bedrock: A Narrative Guide
A comprehensive guide on how to use Zilliz Cloud and AWS Bedrock to build RAG applications
