Getting Started with PyMilvus

Milvus, an open-source vector database, paired with PyMilvus - its Python SDK, is a powerful tool for handling large data sets and performing advanced computations and searches.
This tutorial will guide you in installing and setting up a development environment for using Milvus and PyMilvus. Then, you'll walk through example code for analyzing audio files, storing their data in Milvus, and then using it to compare audio samples for similarities. Let's get started.
What is Milvus?
Milvus is an open-source vector database that handles trillion-scale vector similarity search and analytics. It's a powerful and efficient platform for managing and searching unstructured data through embedding vectors, an increasingly important capability in machine learning, computer vision, recommendation systems, and other artificial intelligence (AI) fields.
At its core, Milvus leverages the concept of embeddings, where data points are represented as high-dimensional vectors. These vectors can capture the similarity between data points based on their semantic or visual features. Milvus enables these vectors' storage, indexing, and retrieval, allowing users to perform fast similarity searches over massive datasets.
With its distributed architecture and support for GPU acceleration, Milvus can efficiently process large volumes of vector data and deliver real-time search results. In addition, it offers a range of indexing algorithms optimized for different use cases, including approximate nearest neighbor (ANN) search algorithms, to balance accuracy and efficiency.
Milvus supports various programming languages and provides easy-to-use APIs, making it accessible to developers and researchers. In addition, it integrates well with popular machine learning frameworks and data processing tools, enabling seamless integration into existing workflows.
What is PyMilvus?
PyMilvus is the Python SDK for Milvus. It's designed to allow Python developers to interact with Milvus easily and efficiently, facilitating tasks such as managing data, conducting vector similarity searches, building indexes, and more.
With PyMilvus, developers leverage the full power of Milvus in their Python applications without having to worry about the intricacies of the underlying database operations. It abstracts away many of the complexities of working with Milvus, providing a simple, easy-to-use API that integrates seamlessly with existing Python workflows.
Setup for the tutorial
The command line examples in this post will be from Linux, but they should translate easily to macOS or Windows with the Windows Subsystem for Linux (WSL). You'll need a system with Docker or Docker Desktop, Python 3.10+, and git.
Milvus bootcamp repository
We're going to use code from the Milvus Bootcamp repository on Github for this tutorial. Start by cloning the repo to your local system.
[egoebelbecker@ares bootcamp]$ git clone https://github.com/milvus-io/bootcamp.git
Cloning into 'bootcamp'...
remote: Enumerating objects: 61861, done.
remote: Counting objects: 100% (4488/4488), done.
remote: Compressing objects: 100% (1628/1628), done.
remote: Total 61861 (delta 2983), reused 4180 (delta 2791), pack-reused 57373
Receiving objects: 100% (61861/61861), 166.78 MiB | 4.91 MiB/s, done.
Resolving deltas: 100% (28214/28214), done.
Python virtual environment
Next, create a virtual environment to run your code. You can put it in the directory where you cloned the bootcamp repo. Activate the environment after you've created it.
[egoebelbecker@ares bootcamp]$ cd bootcamp
[egoebelbecker@ares bootcamp]$ git checkout archive20230625
[egoebelbecker@ares bootcamp]$ python3 -m venv ./venv
[egoebelbecker@ares bootcamp]$ source venv/bin/activate
(venv) [egoebelbecker@ares bootcamp]$
Install Python dependencies
Now it's time to set up our project.
We're going to use the Audio Similarity Search example. It uses a publicly-available set of audio files to demonstrate how you can use Milvus to detect similarities between different samples.
Move to the project's subdirectory and look at the requirements.txt file supplied with the code.
(venv) [egoebelbecker@ares bootcamp]$ cd solutions/audio/audio_similarity_search/
(venv) [egoebelbecker@ares audio_similarity_search]$ cat requirements.txt
pymilvus
redis
librosa
numpy
panns_inference
torch
diskcache
gdown
These are the Python libraries needed to run the project. Use pip to install them. Then, add Jupyter so we can run the notebook.
(venv) [egoebelbecker@ares audio_similarity_search]$ pip install -r requirements.txt
(Lots of output)
(venv) [egoebelbecker@ares audio_similarity_search]$ pip install jupyter
(More output)
Start Redis
Now, start a Redis Docker container.
docker run --name redis -d -p 6379:6379 redis
Install and start Milvus Lite
Finally, you'll need a Milvus server. The easiest way to get up and running with Milvus is Milvus Lite, which runs in Python. Install the milvus packages.
(venv) [egoebelbecker@ares audio_similarity_search]$ pip install milvus
(Lots of output)
(venv) [egoebelbecker@ares audio_similarity_search]$ milvus-server


    __  _________ _   ____  ______
   /  |/  /  _/ /| | / / / / / __/
  / /|_/ // // /_| |/ / /_/ /\ \
 /_/  /_/___/____/___/\____/___/ {Lite}

 Welcome to use Milvus!

 Version:   v2.2.8-lite
 Process:   275118
 Started:   2023-05-25 12:41:47
 Config:    /home/egoebelbecker/.milvus.io/milvus-server/2.2.8/configs/milvus.yaml
 Logs:      /home/egoebelbecker/.milvus.io/milvus-server/2.2.8/logs

 Ctrl+C to exit ...
PyMilvus Project
Now, with an environment set up, you can run the tutorial.
Start Jupyter
Start Jupyter from your virtual environment.
(venv) [egoebelbecker@ares audio_similarity_search]$ python -m jupyter notebook --notebook-dir=`pwd`
  _   _          _      _
 | | | |_ __  __| |__ _| |_ ___
 | |_| | '_ \/ _` / _` |  _/ -_)
  \___/| .__/\__,_\__,_|\__\___|
       |_|

Read the migration plan to Notebook 7 to learn about the new features and the actions to take if you are using extensions.

https://jupyter-notebook.readthedocs.io/en/latest/migrate_to_notebook7.html

(More output)
This will open the Jupyter Files page in your default browser.
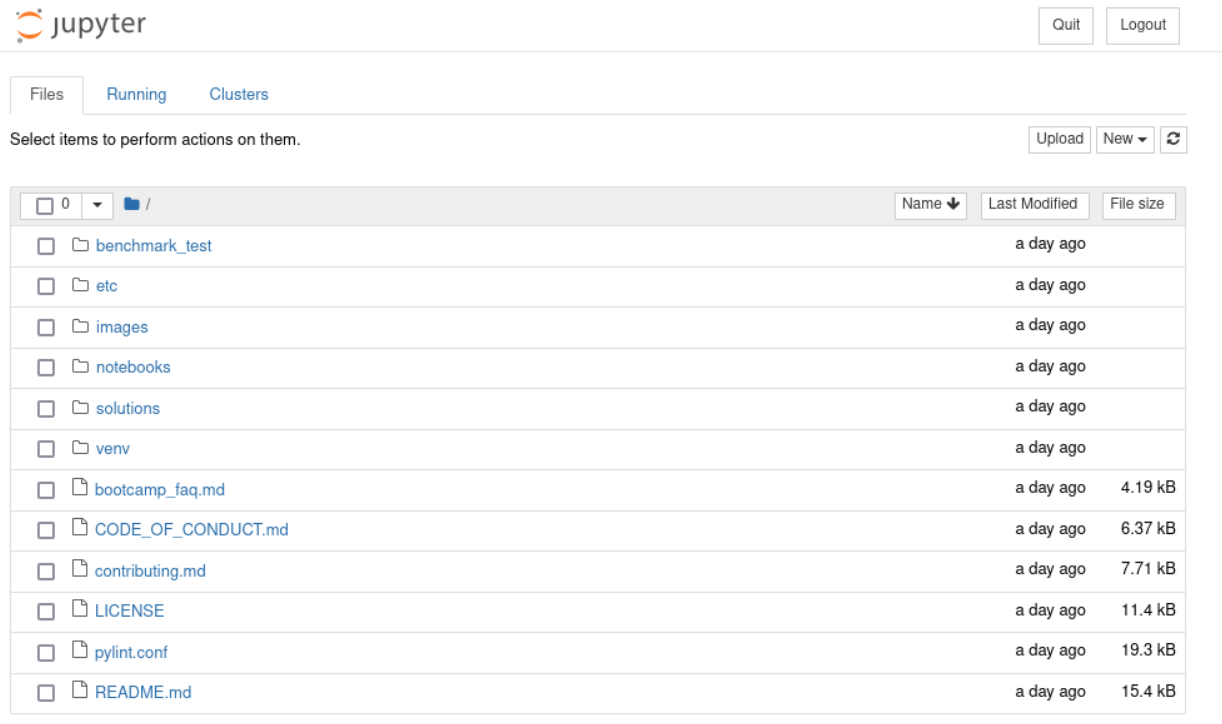 Navigate to the
 solutions/audio/audio_similarity_search directory.
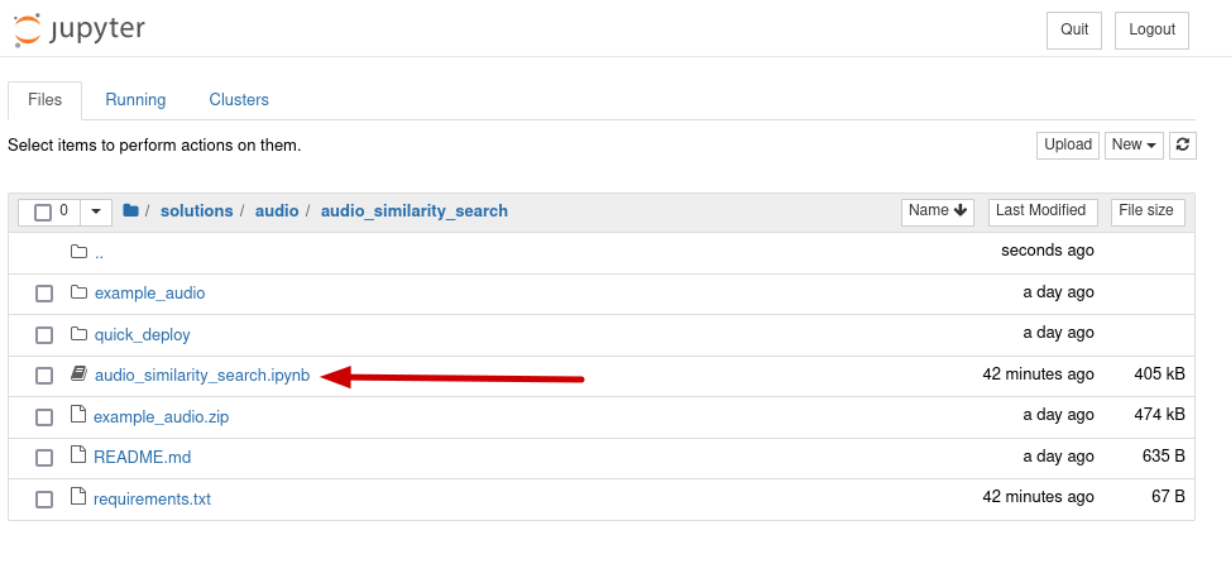
Open the audio_similarity_search notebook.
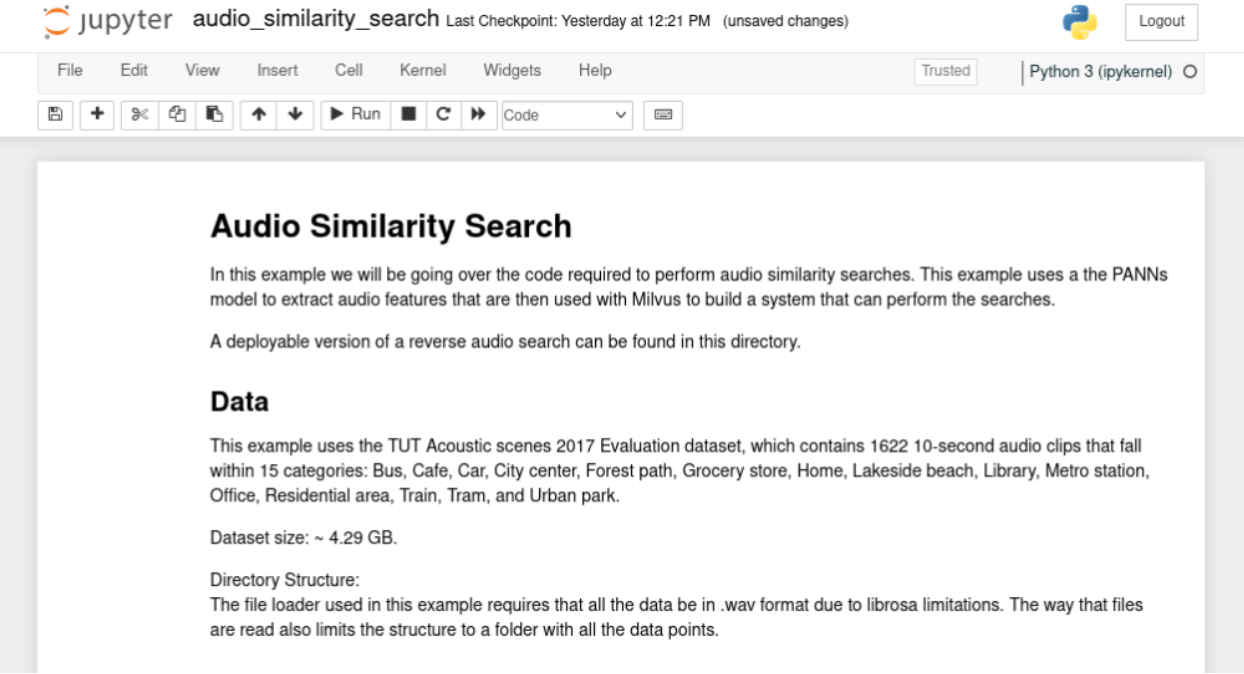
Connect to Redis and Milvus
You've already done the initial setup, so scroll right down to the Code Overview section. The code starts by importing libraries for Redis and Milvus.
On the second line, you can see the classes you'll need to connect to Milvus, create a Collection, and add and retrieve data from it.
import redis
from pymilvus import connections, DataType, FieldSchema, CollectionSchema, Collection, utility

connections.connect(host = '127.0.0.1', port = 19530)
red = redis.Redis(host = '127.0.0.1', port=6379, db=0)
Then, the code connects to the two servers. Run this block. Now, it's time to create a Milvus collection to store information about each audio file.
import time

red.flushdb()
time.sleep(.1)
collection_name = "audio_test_collection"

if utility.has_collection(collection_name):
    print("Dropping existing collection...")
    collection = Collection(name=collection_name)
    collection.drop()

#if not utility.has_collection(collection_name):
field1 = FieldSchema(name="id", dtype=DataType.INT64, description="int64", is_primary=True,auto_id=True)
field2 = FieldSchema(name="embedding", dtype=DataType.FLOAT_VECTOR, description="float vector", dim=2048, is_primary=False)
schema = CollectionSchema(fields=[ field1,field2], description="collection description")
collection = Collection(name=collection_name, schema=schema)
print("Created new collection with name: " + collection_name)
Create a Milvus Collection
This step creates a collection named audio_test_collection with two fields:
- id - an integer identification field
- embedding - a vector of 2048 floating point numbers to store data about the audio files
Run this block and you'll see this message:
Dropping existing collection...
Created new collection with name: audio_test_collection
Next, add an index to your new collection:
if utility.has_collection(collection_name):
    collection = Collection(name = collection_name)
default_index = {"index_type": "IVF_SQ8", "metric_type": "L2", "params": {"nlist": 16384}}
status = collection.create_index(field_name = "embedding", index_params = default_index)
if not status.code:
    print("Successfully create index in collection:{} with param:{}".format(collection_name, default_index))
Run this block:
Successfully create index in collection:audio_test_collection with param:{'index_type': 'IVF_SQ8', 'metric_type': 'L2', 'params': {'nlist': 16384}}
Store audio data
Milvus is ready to store the audio data now. Let's break the next code block down and take a close look.
import os
import librosa
import gdown
import zipfile
import numpy as np
from panns_inference import SoundEventDetection, labels, AudioTagging

data_dir = './example_audio'
at = AudioTagging(checkpoint_path=None, device='cpu')

def download_audio_data():
    url = 'https://drive.google.com/uc?id=1bKu21JWBfcZBuEuzFEvPoAX6PmRrgnUp'
    gdown.download(url)
    with zipfile.ZipFile('example_audio.zip', 'r') as zip_ref:
        zip_ref.extractall(data_dir)
This section imports libraries for processing the files. Then. it creates an AudioTagging object from the Panns Inference library.
This is a Python interface to the Large-Scale Pretrained Audio Neural Networks for Audio Pattern Recognition (PANNs).
The AudioTagging class will create a set of data points for each audio file, similar to this:
Speech: 0.893
Telephone bell ringing: 0.754
Inside, small room: 0.235
Telephone: 0.183
Music: 0.092
Ringtone: 0.047
Inside, large room or hall: 0.028
Alarm: 0.014
Animal: 0.009
Vehicle: 0.008
embedding: (2048,)
Next is the code to download the files, analyze them, and insert the data into Milvus, and the file information into Redis:
def embed_and_save(path, at):

    audio, _ = librosa.core.load(path, sr=32000, mono=True)
    audio = audio[None, :]
    try:
        _, embedding = at.inference(audio)
        embedding = embedding/np.linalg.norm(embedding)
        embedding = embedding.tolist()[0]
        mr = collection.insert([[embedding]])
        ids = mr.primary_keys
        collection.load()
        red.set(str(ids[0]), path)
    except Exception as e:
        print("failed: " + path + "; error {}".format(e))
This code block puts it all together:
print("Starting Insert")
download_audio_data()
for subdir, dirs, files in os.walk(data_dir):
    for file in files:
        path = os.path.join(subdir, file)
        embed_and_save(path, at)
print("Insert Done")
Run the code:
Checkpoint path: /home/egoebelbecker/panns_data/Cnn14_mAP=0.431.pth
Using CPU.
Starting Insert

Downloading...
From: [https://drive.google.com/uc?id=1bKu21JWBfcZBuEuzFEvPoAX6PmRrgnUp](https://drive.google.com/uc?id=1bKu21JWBfcZBuEuzFEvPoAX6PmRrgnUp)
To: /home/egoebelbecker/src/bootcamp/solutions/audio/audio_similarity_search/example_audio.zip
100%|█████████████████████████████████████████████████████████████████████████████████████████| 474k/474k [00:00<00:00, 8.87MB/s]

Insert Done
Search for similarities
To search the database, you need to perform the same analysis on the files you need to match. Here's code to do that to a randomly selected set of file ids.
```python
def get_embed(paths, at):
    embedding_list = []
    for x in paths:
        audio, _ = librosa.core.load(x, sr=32000, mono=True)
        audio = audio[None, :]
        try:
            _, embedding = at.inference(audio)
            embedding = embedding/np.linalg.norm(embedding)
            embedding_list.append(embedding)
        except:
            print("Embedding Failed: " + x)
    return np.array(embedding_list, dtype=np.float32).squeeze()

random_ids = [int(red.randomkey()) for x in range(2)]
search_clips = [x.decode("utf-8") for x in red.mget(random_ids)]
embeddings = get_embed(search_clips, at)
print(embeddings.shape)
Run this block to select two files and run the analysis. Now, it's time to perform a search in Milvus. This code displays the search results in audio players:
import IPython.display as ipd

def show_results(query, results, distances):
    print("Query: ")
    ipd.display(ipd.Audio(query))
    print("Results: ")
    for x in range(len(results)):
        print("Distance: " + str(distances[x]))
        ipd.display(ipd.Audio(results[x]))
    print("-"*50)
Next, the program takes the embeddings array build above and converts it into a list. Then it creates our search parameters. We're searching for two similar sounds, and using nprobe for the criteria. This matches the index type you used above.
embeddings_list = embeddings.tolist()

search_params = {"metric_type": "L2", "params": {"nprobe": 16}}
Finally, here is the search.
try:
    start = time.time()
    results = collection.search(embeddings_list, anns_field="embedding", param=search_params, limit=3)
    end = time.time() - start
    print("Search took a total of: ", end)
    for x in range(len(results)):
        query_file = search_clips[x]
        result_files = [red.get(y.id).decode('utf-8') for y in results[x]]
        distances = [y.distance for y in results[x]]
        show_results(query_file, result_files, distances)
except Exception as e:
    print("Failed to search vectors in Milvus: {}".format(e))
Run it, and you'll see the randomly selected files, and two search results, with their distance from the original.
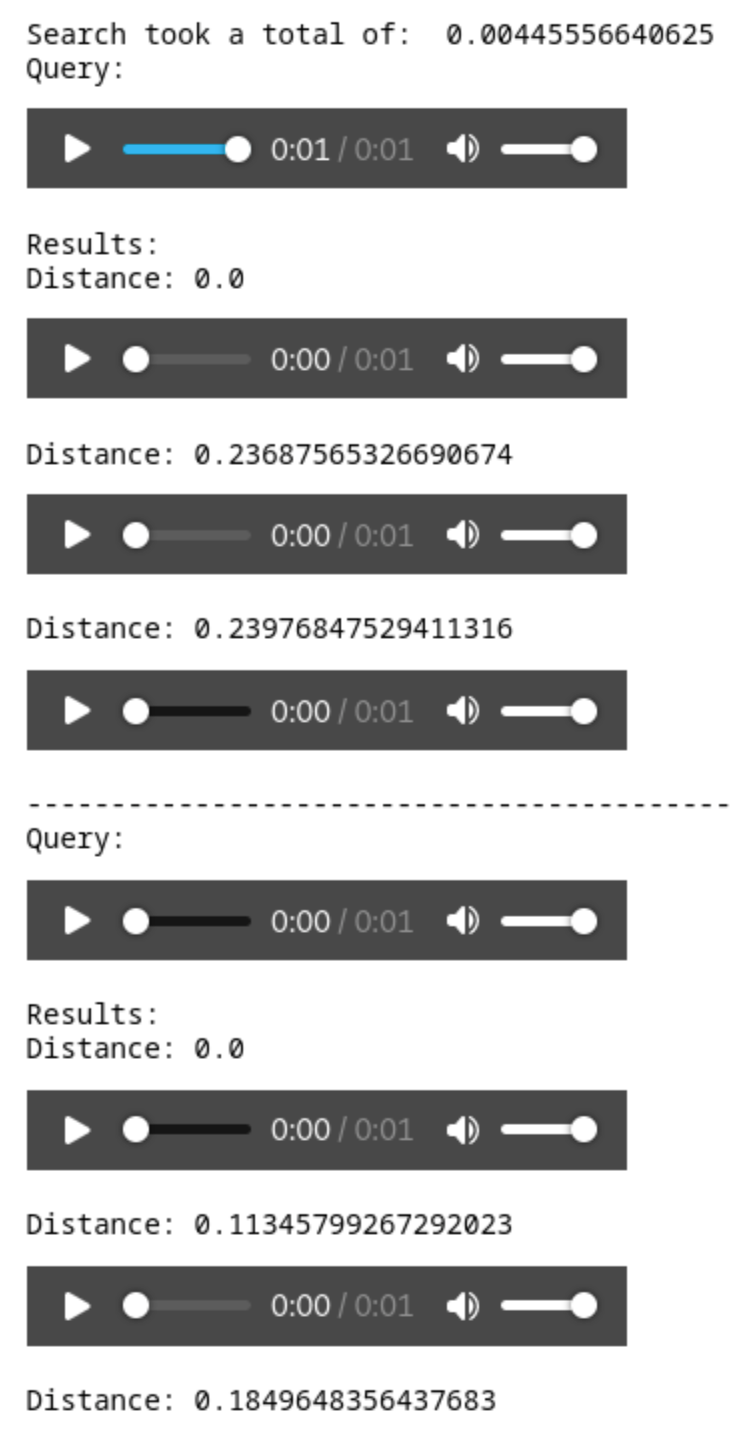
Listen to each file, and you'll hear the exact match and its closest neighbor.
Summary
In this post, you learned how to build a Python environment for working with Milvus. After setting up a server and the PyMilvus SDK, you ran a sample tutorial from the Milvus Bootcamp repository. You saw code to create a collection, index it, store data, and perform a basic search.
Now that you've seen how easy it is to get started with Milvus, continue with the bootcamp projects and see how you can use Milvus to enhance your projects.
This post was written by Eric Goebelbecker. Eric has worked in the financial markets in New York City for 25 years, developing infrastructure for market data and financial information exchange (FIX) protocol networks. He loves to talk about what makes teams effective (or not so effective!).
Start Free, Scale Easily
Try the fully-managed vector database built for your GenAI applications.
Try Zilliz Cloud for FreeKeep Reading
Why Teams Are Migrating from Weaviate to Zilliz Cloud — and How to Do It Seamlessly
Explore how Milvus scales for large datasets and complex queries with advanced features, and discover how to migrate from Weaviate to Zilliz Cloud.
Vector Databases vs. Spatial Databases
Use a vector database for AI-powered similarity search; use a spatial database for geographic and geometric data analysis and querying.

DeepSeek vs. OpenAI: A Battle of Innovation in Modern AI
Compare OpenAI's o1 and o3-mini with DeepSeek R1's open-source alternative. Discover which AI model offers the best balance of reasoning capabilities and cost efficiency.
