



Sfatare i malintesi sulla velocità di inserimento dei dati in Milvus
Molti utenti che si affidano a LangChain o LlamaIndex per i loro passaggi API comodi e più brevi potrebbero pensare che "L’inserimento dei dati in Milvus sia lento." Tuttavia, questa percezione spesso deriva dal sorvolare sui passaggi dettagliati del processo.
I passaggi nascosti
Quando si usano LangChain o LlamaIndex, queste librerie convertono dati non strutturati (come testi, immagini o suoni) in vettori usando modelli di embedding. Poi inseriscono questi vettori in Milvus Lite. Le librerie semplificano questo processo complesso gestendo per te molteplici passaggi dietro le quinte.
Questa astrazione può creare l’illusione che il processo di inserimento dei dati richieda molto tempo.
Il divoratore di tempo: generazione degli embedding
Il tempo medio impiegato per generare embedding da dati non strutturati è significativamente più lungo del tempo necessario per inserire dati in Milvus. La lentezza percepita è spesso dovuta al processo computazionalmente intensivo di trasformazione dei dati in rappresentazioni vettoriali, piuttosto che alla fase di inserimento dei dati.
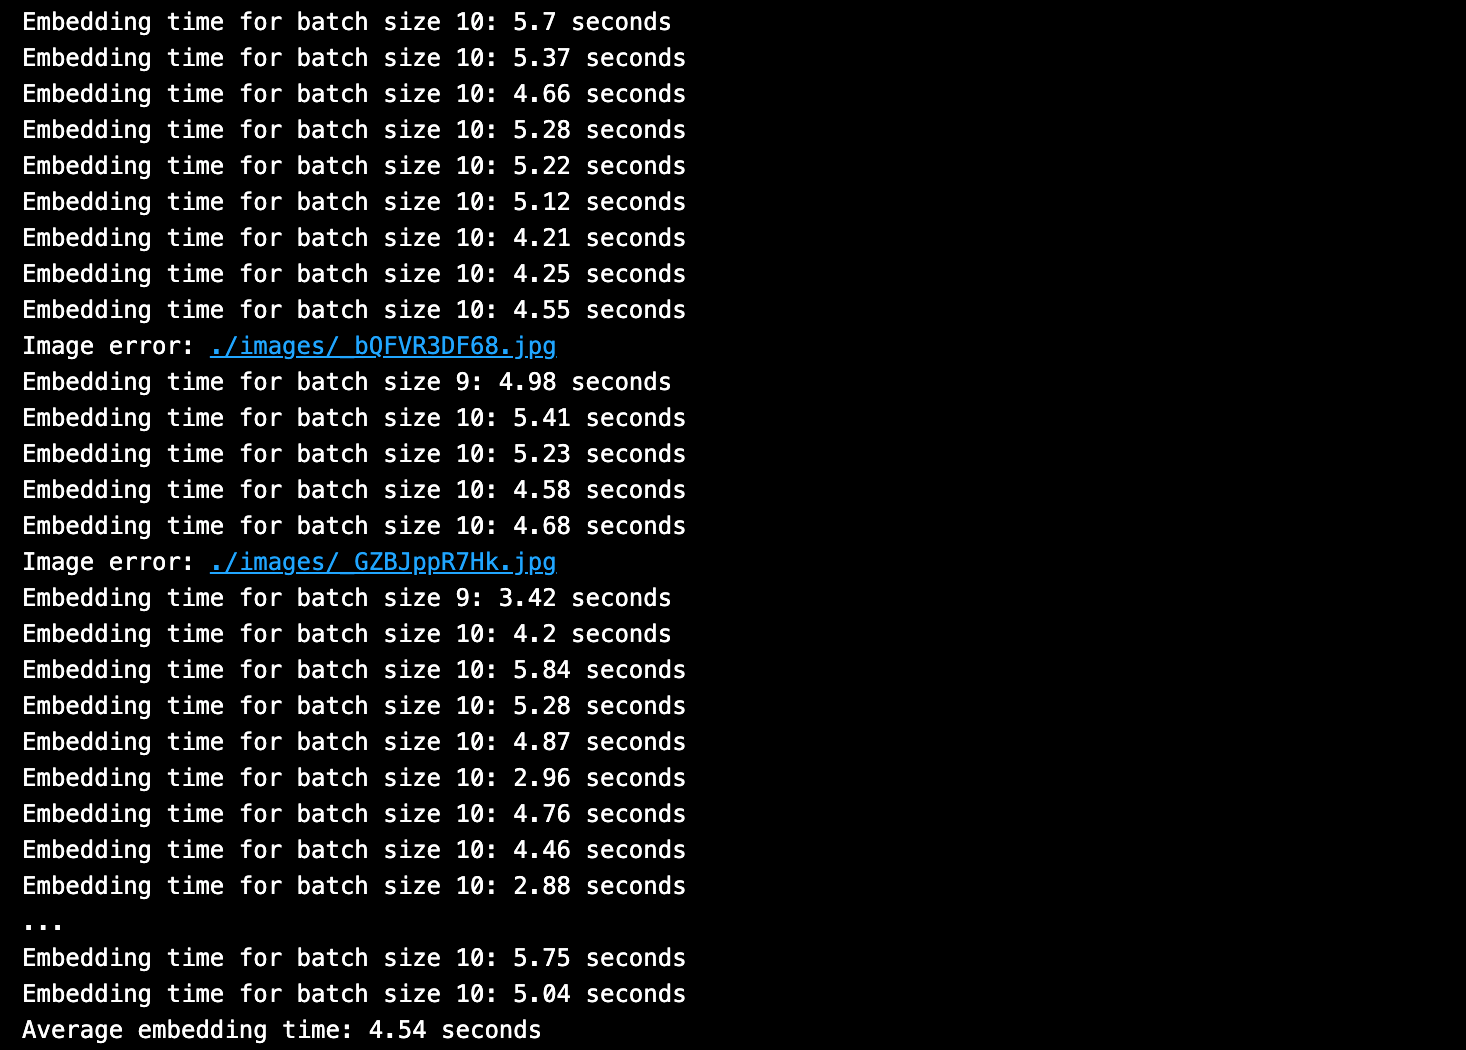
Per illustrare la differenza tra i tempi di generazione degli embedding e quelli di inserimento dei dati, mostrerò un esempio in questo blog in cui il tempo medio di embedding è di circa 5 secondi. Al contrario, il tempo medio di inserimento nel database vettoriale Milvus è solo di circa un decimo di secondo. Il codice completo è sul mio GitHub.
In altre parole, circa il 97% del tempo di "inserimento in Milvus" osservato in LangChain o LlamaIndex viene speso nella generazione degli embedding, mentre circa il 3% viene speso nella fase effettiva di inserimento nel database.
Ho mostrato in un blog precedente come connettersi a Milvus Lite usando LlamaIndex o LangChain.
Nelle sezioni seguenti, tratterò:
Esempio di codice LlamaIndex per inserire dati in Milvus
Esempio di codice LangChain per inserire dati in Milvus
Esempio di codice API Pymilvus per inserire dati in Milvus
Esempio di codice LlamaIndex per inserire dati in Milvus
Ecco un esempio di codice in LlamaIndex.
from llama_index.core import (
   ServiceContext,
   StorageContext,
   VectorStoreIndex,
)
from llama_index.embeddings.huggingface import HuggingFaceEmbedding
from llama_index.vector_stores.milvus import MilvusVectorStore
import time

# Define the embedding model.
service_context = ServiceContext.from_defaults(
   # LlamaIndex local: translates to the same location as default HF cache.
   embed_model="local:BAAI/bge-large-en-v1.5",
)

# Create a Milvus collection from the documents and embeddings.
EMBEDDING_DIM = 1024
vectorstore = MilvusVectorStore(
   uri="./milvus_llamaindex.db",
   dim=EMBEDDING_DIM,
   # Override LlamaIndex default values for Milvus.
   consistency_level="Eventually",
   drop_old=True,
   index_params = {
       "metric_type": "COSINE",
       "index_type": "AUTOINDEX",
       "params": {},}
)
storage_context = StorageContext.from_defaults(
   vector_store=vectorstore
)
llamaindex = VectorStoreIndex.from_documents(
   lli_docs[:1],
   storage_context=storage_context,
   service_context=service_context
)

Esempio di codice LangChain per inserire dati in Milvus
Ecco un esempio di codice in LangChain.
from langchain_milvus import Milvus
from langchain_huggingface import HuggingFaceEmbeddings
from langchain.text_splitter import RecursiveCharacterTextSplitter
import time

# Define the embedding model.
model_name = "BAAI/bge-large-en-v1.5"
model_kwargs = {'device': 'cpu'}
encode_kwargs = {'normalize_embeddings': True}
embed_model = HuggingFaceEmbeddings(
   model_name=model_name,
   model_kwargs=model_kwargs,
   encode_kwargs=encode_kwargs
)
EMBEDDING_DIM = embed_model.dict()['client'].get_sentence_embedding_dimension()

# Define the chunking strategy.
text_splitter = RecursiveCharacterTextSplitter(chunk_size=512, chunk_overlap=51)

# Create a Milvus collection from the documents with chunking and embeddings.
start_time = time.time()
docs = text_splitter.split_documents(docs)
vectorstore = Milvus.from_documents(
   documents=docs,
   embedding=embed_model,
   connection_args={"uri": "./milvus_demo.db"},
   # Override LangChain default values for Milvus.
   consistency_level="Eventually",
   drop_old=True,
   index_params = {
       "metric_type": "COSINE",
       "index_type": "AUTOINDEX",
       "params": {},}
)

Esempio di codice API Pymilvus per inserire dati in Milvus
Utilizzando direttamente le chiamate API Pymilvus, mostriamo cosa accade realmente dietro le quinte di quei codici brevi e comodi di LangChain e LlamaIndex.
Gli esempi precedenti utilizzavano pagine web della documentazione di Milvus scaricate direttamente da Internet. Per mostrare la differenza tra i tempi di embedding e i tempi di inserimento, userò di seguito un modello di embedding multimodale open-source per 1) incorporare sia immagini sia testi e 2) inserire i vettori densi in Milvus.
import pymilvus
import requests
from io import BytesIO

# Run this in small batches to avoid memory issues.
BATCH_SIZE = 10

# Batch embed text and images and insert data into Milvus.
batch_embedding_times = []
batch_insert_times = []
for i in range(0, 300, BATCH_SIZE):
   batch_images = []
   batch_texts = []
   batch_urls = []
   for j in range(BATCH_SIZE):
       if i + j < len(image_texts):
           text = image_texts[i + j]
           url = image_urls[i + j]
           with Image.open(f"./images/{url}.jpg") as img:
               batch_images.append(img.copy())
               batch_texts.append(text)
               batch_urls.append(url)

   # STEP 1. EMBEDDING INFERENCE FOR TEXT AND IMAGES.
   start_time = time.time()
   image_embeddings, text_embeddings = embedding_model(
       batch_images=batch_images,
       batch_texts=batch_texts)
   end_time = time.time()
   # print(f"Embedding time for batch size {len(batch_images)}: ", end="")
   # print(f"{np.round(end_time - start_time, 2)} seconds")
   batch_embedding_times.append(end_time - start_time)

   # STEP 2. INSERT CHUNK LIST INTO MILVUS OR ZILLIZ.
   chunk_dict_list = []
   # Create chunk dict_list.
   for chunk, img_url, img_embed, text_embed in zip(
       batch_texts,
       batch_urls,
       image_embeddings, text_embeddings):
       chunk_dict = {
           'chunk': chunk,
           'image_filepath': img_url,
           'text_vector': text_embed,
           'image_vector': img_embed
       }
       chunk_dict_list.append(chunk_dict)

   start_time = time.time()
   try:
       col.insert(data=chunk_dict_list)
   except:
       print(f"Insert error: {img_url}")
   end_time = time.time()
   # print(f"Insert time for {len(chunk_dict_list)} vectors: ", end="")
   # print(f"{np.round(end_time - start_time, 4)} seconds")
   batch_insert_times.append(end_time - start_time)
   col.flush()

# Calculate the average embedding time.
average_time = np.mean(batch_embedding_times)
print(f"Average embedding time: {round(average_time,2)} seconds")

# Calculate the average insert time.
average_time = np.mean(batch_insert_times)
print(f"Average insert time: {round(average_time,2)} seconds")
Ecco l'output dei tempi di embedding in batch.
Ecco l'output dei tempi di inserimento dei dati in batch in Milvus.

Il tempo medio di embedding è stato di ~5 secondi, e il tempo medio di inserimento nel database vettoriale Milvus è stato di circa un decimo di secondo. Ciò si traduce in circa il 97% del tempo totale impiegato nella generazione degli embedding, mentre circa il 3% è stato impiegato nell'inserimento nel database.
Come puoi vedere, la fase di embedding è quella che richiede più tempo!
Risorse e ulteriori letture

Continua a leggere

Democratizing AI: Making Vector Search Powerful and Affordable
Zilliz democratizes AI vector search with Milvus 2.6 and Zilliz Cloud for powerful, affordable scalability, cutting costs in infrastructure, operations, and development.

Vector Databases vs. Key-Value Databases
Use a vector database for AI-powered similarity search; use a key-value database for high-throughput, low-latency simple data lookups.

Selecting the Right ETL Tools for Unstructured Data to Prepare for AI
Learn the right ETL tools for unstructured data to power AI. Explore key challenges, tool comparisons, and integrations with Milvus for vector search.